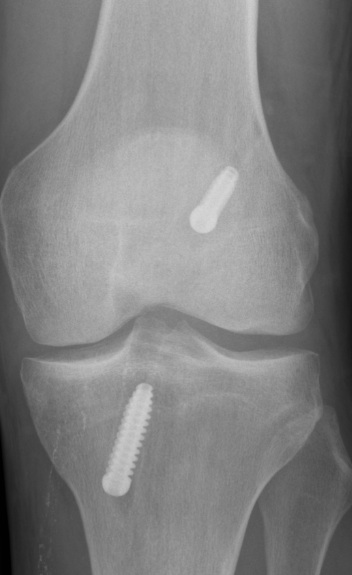
Endobutton + Interference screw +/- staple or post
Advantage
- endobutton simple yet strong fixation
- endobutton eliminates problem if blow out back wall
- can still use femoral RCI screw if run into problems with endobutton
Set up
GA, tourniquet, IV antibiotics
- knee roll, lateral support
- knee at 90o for optimum access to notch
- but need to be able to hyperflex for femoral tunnel
- EUA to confirm positive pivot shift
- +/- pressure pump
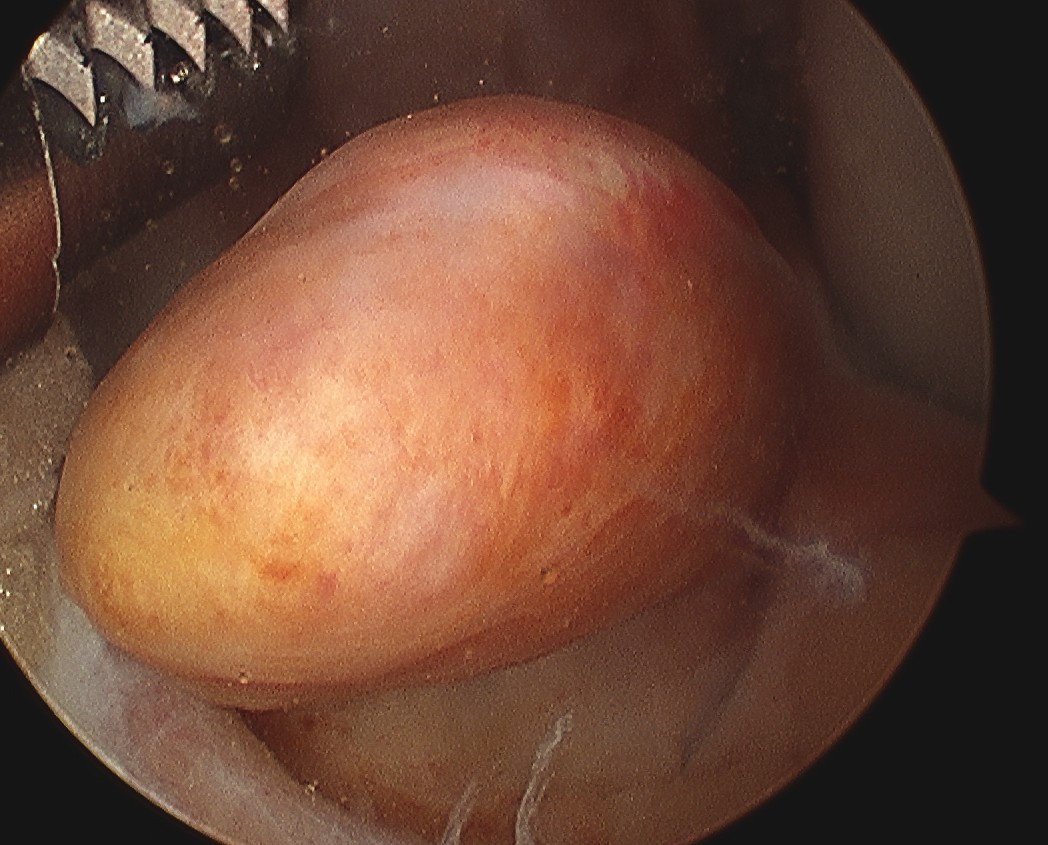
Harvest graft
- RCT of doubled semiT/gracilis versus 4 strand semiT
- 126 patients
- worse outcomes with 4 strand semiT in female patients
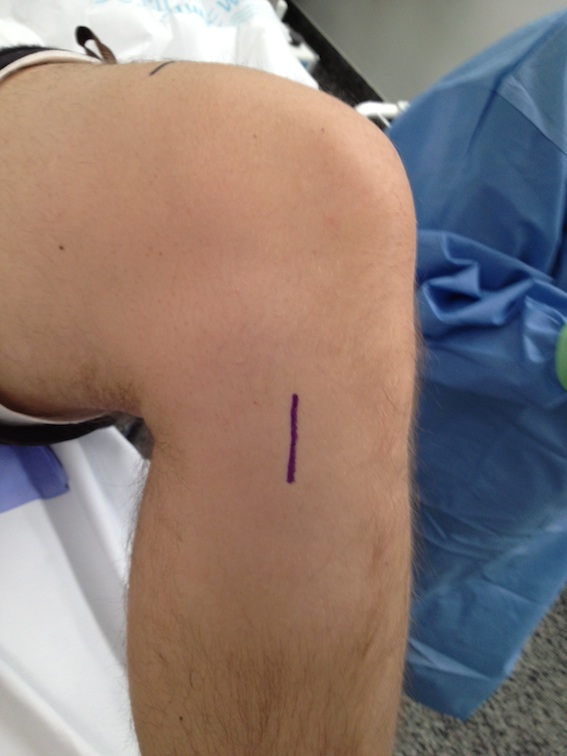
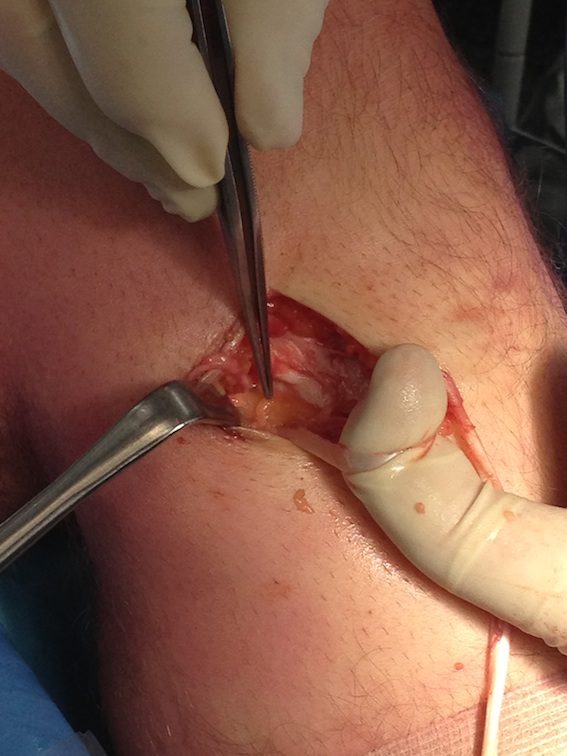
Knee flexed 90o
- usually roll tendons under finger
- longitudinal incision
- 2cm below joint line / 2 cm medial to crest / 2 cm long
- superior aspect of incision at level of tibial tuberosity
- separate skin and subcutaneous fat
- view sartorius fascia
- roll tendons again
- use knife and make cut above and parallel to gracilis
- elevate fascial flap
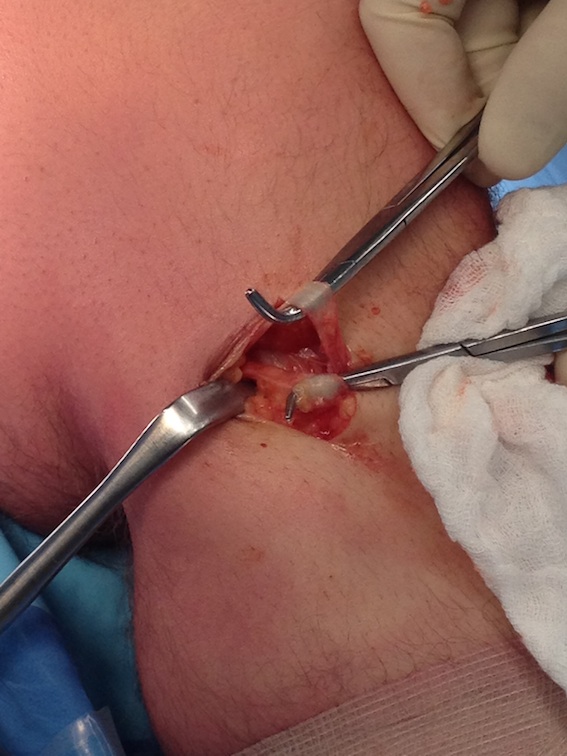
- used curved hook, identify both tendons first
- isolate gracilis (say Grace before Tea)
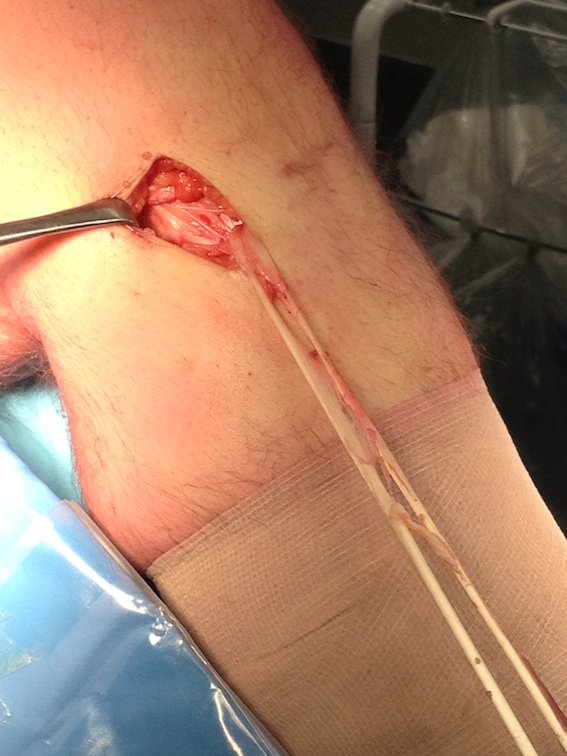
- divide vinculae (usually one)
- use tendon harvester in straight line aiming towards ischial tuberosity
- isolate ST, divide larger vinculae (there is nearly always two), strip
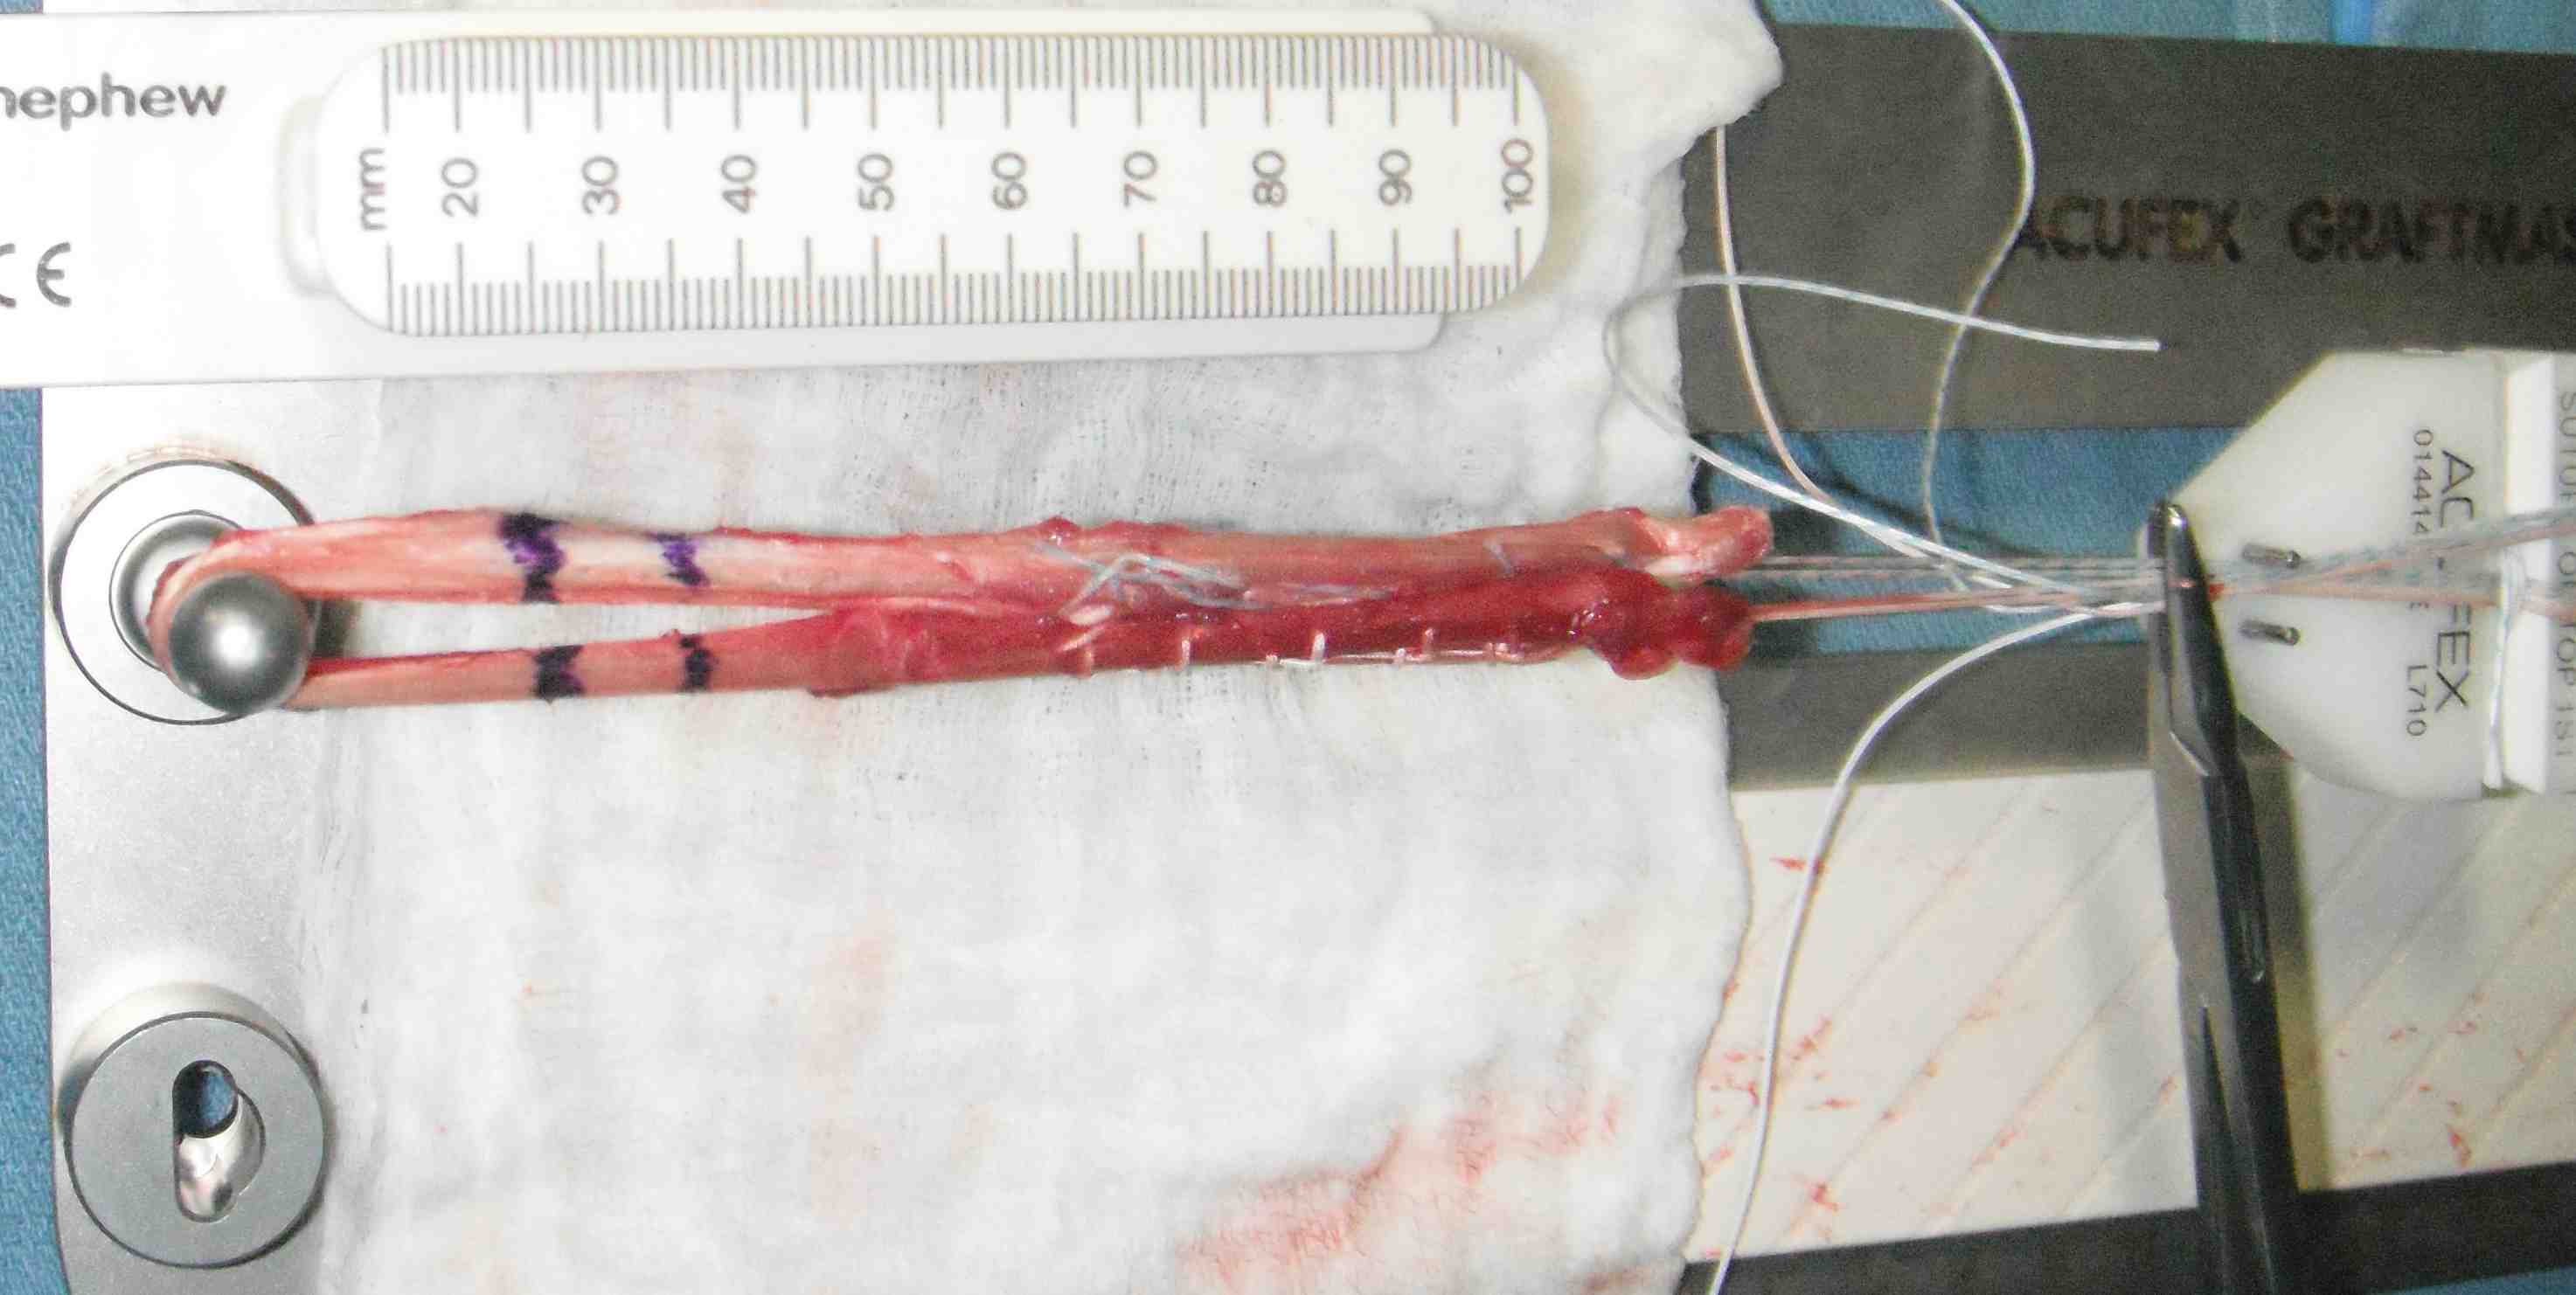
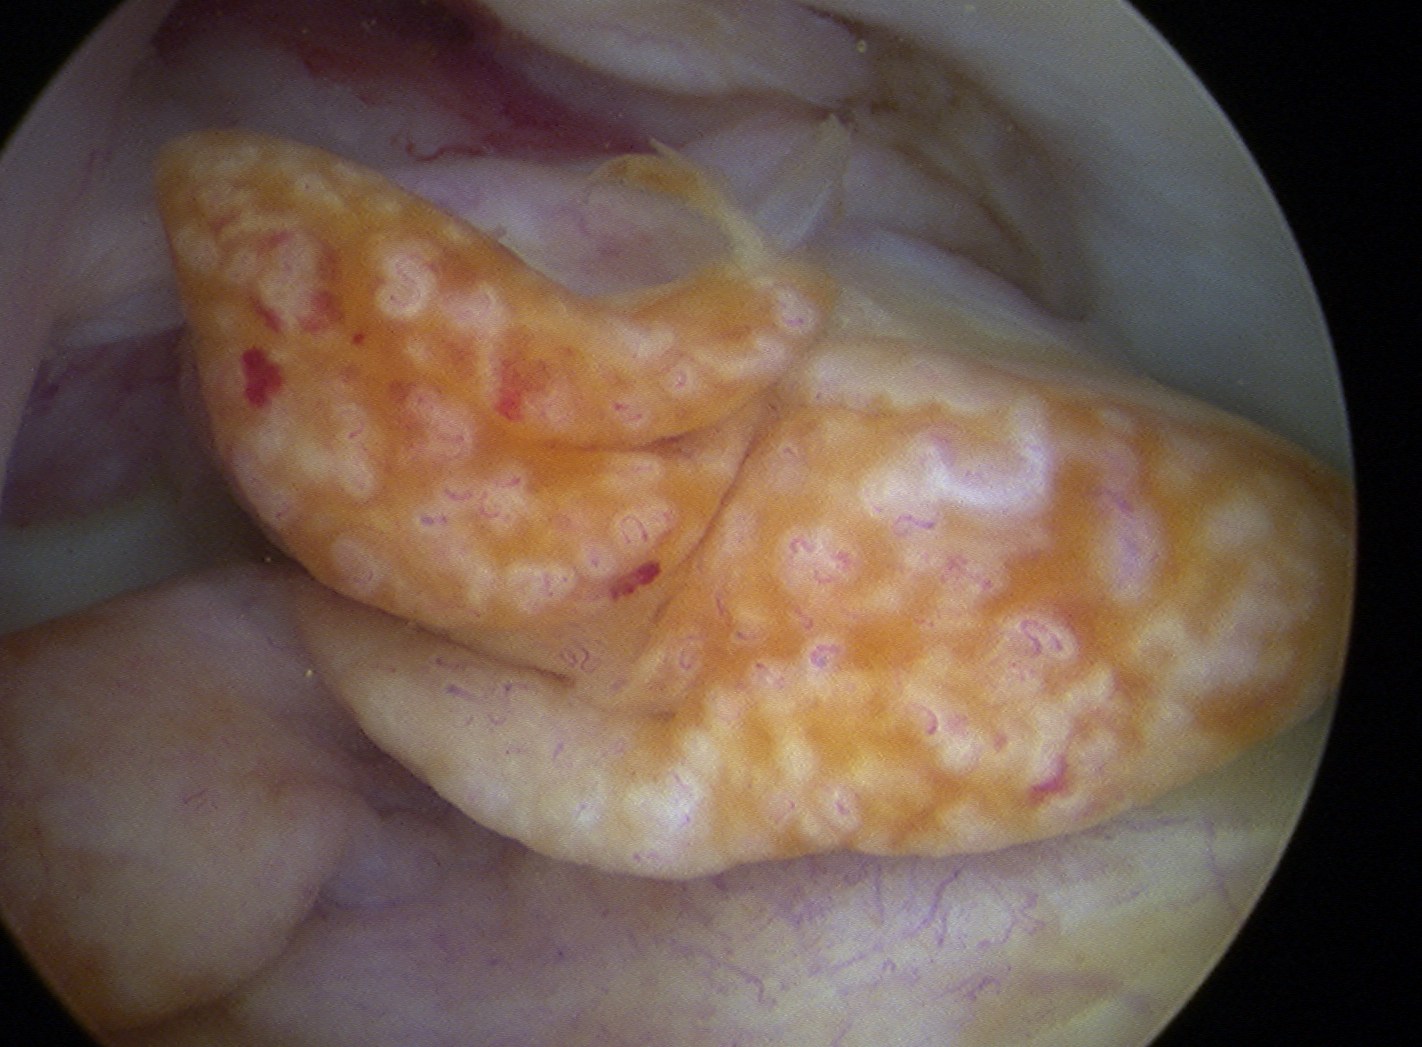
Prepare graft
Leave tendons attached to tibia or remove and prepare on table
- remove muscle with scissors / spoon
- loop both tendons through endobutton to create 4 strand
- can suture all 4 ends together or do each 2 separately
- no 1 ethibond / ticron / fibrewire
Tensioner
- 10 - 15 lb
Endobutton Choices
30mm / 20mm / 15mm loops
- if shorter graft / longer tunnel use longer lopp
Size graft
Will be usually 7.5 - 8.5 mm in man
- 6.5 - 7.5 in woman
- ream a tunnel to the same size as the graft
- a tight tunnel fit may mean less fluid to cause tunnel widening
- will potentially make passing the graft / flipping the endobutton harder
Arthroscopy
Lateral portal
- high and midline
- need to be able to see around corner medial wall of LFC
Medial portal
- low and midline
- if too medial risk damaging MFC with reamers
- too lateral means graft too vertical
- low position gives good angle on femoral tunnel
- best to trial with needle first
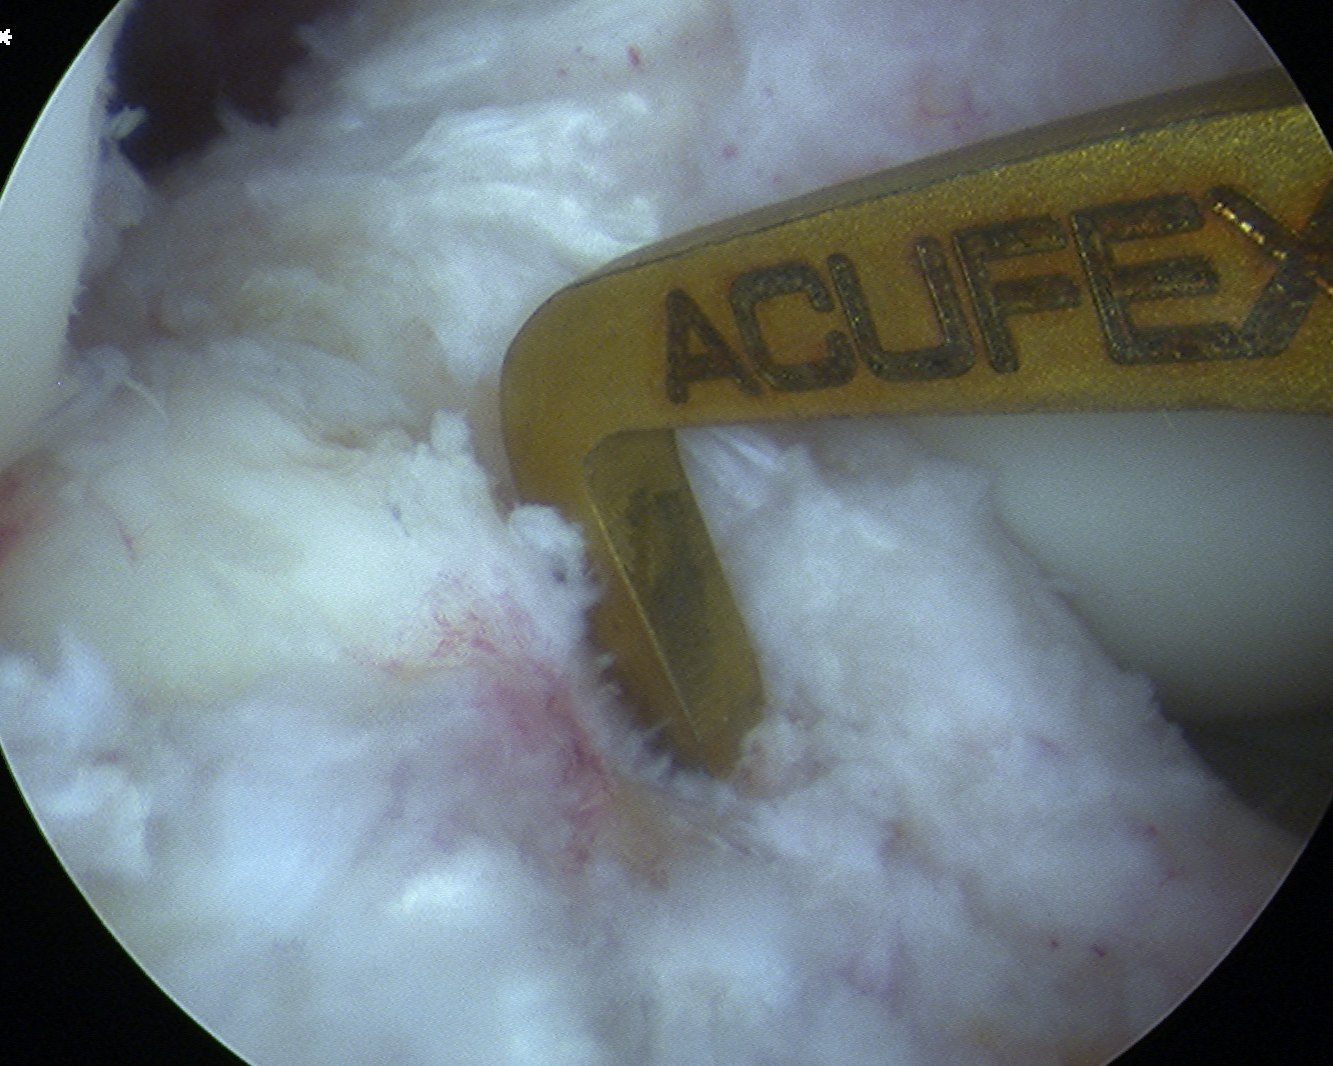
Assess and manage mensicus as appropriate
- assess and manage chondral lesions as appropriate
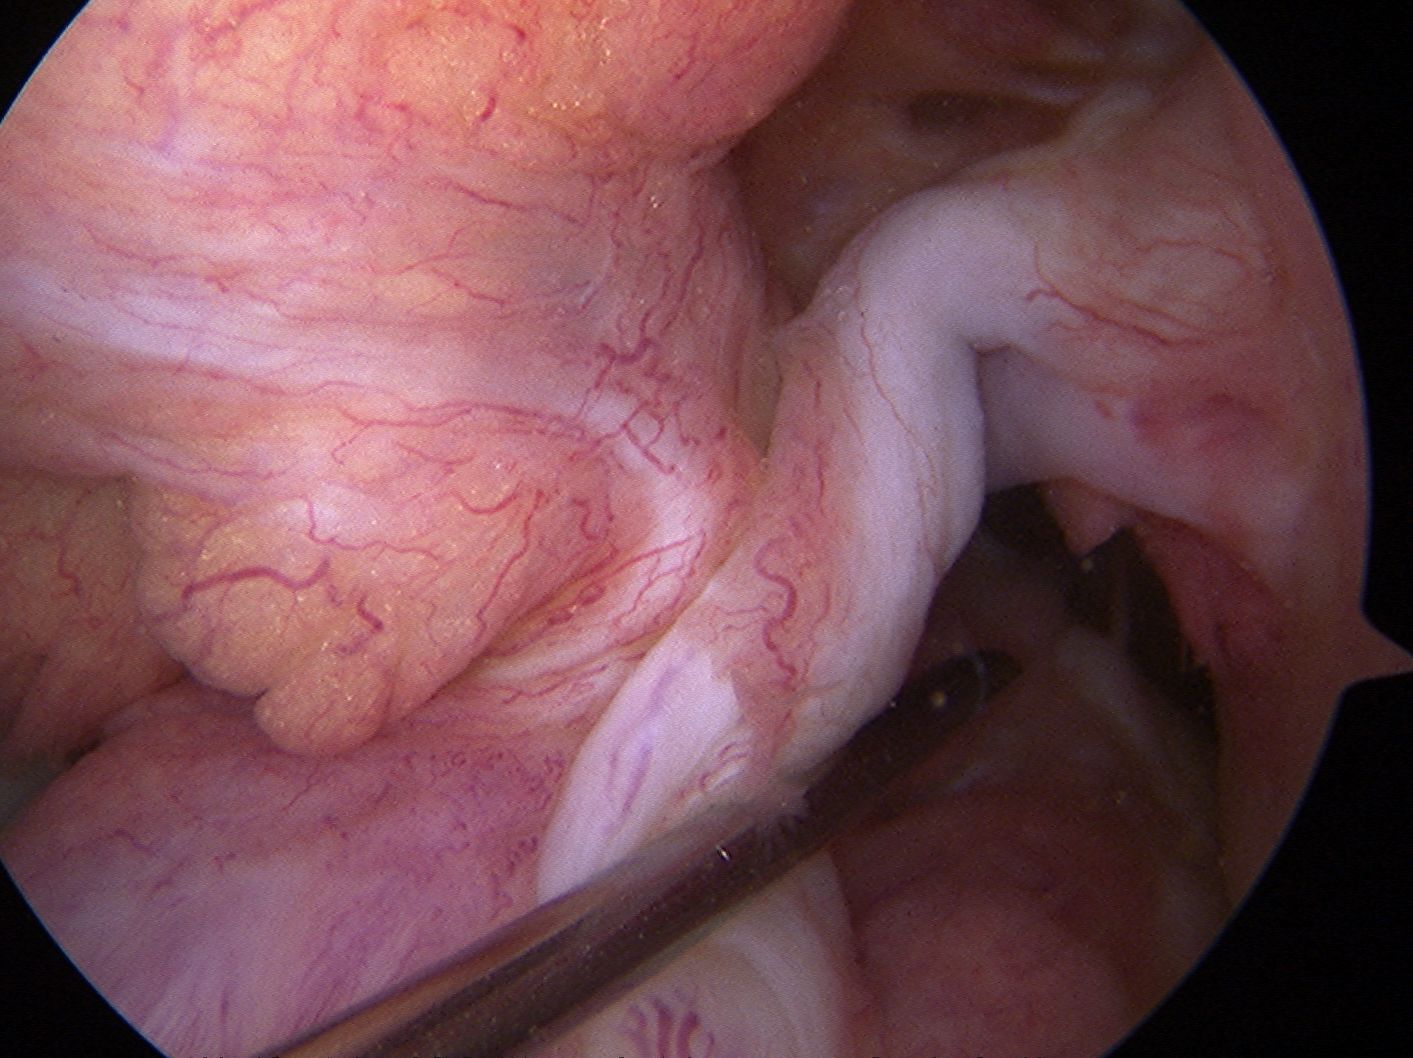
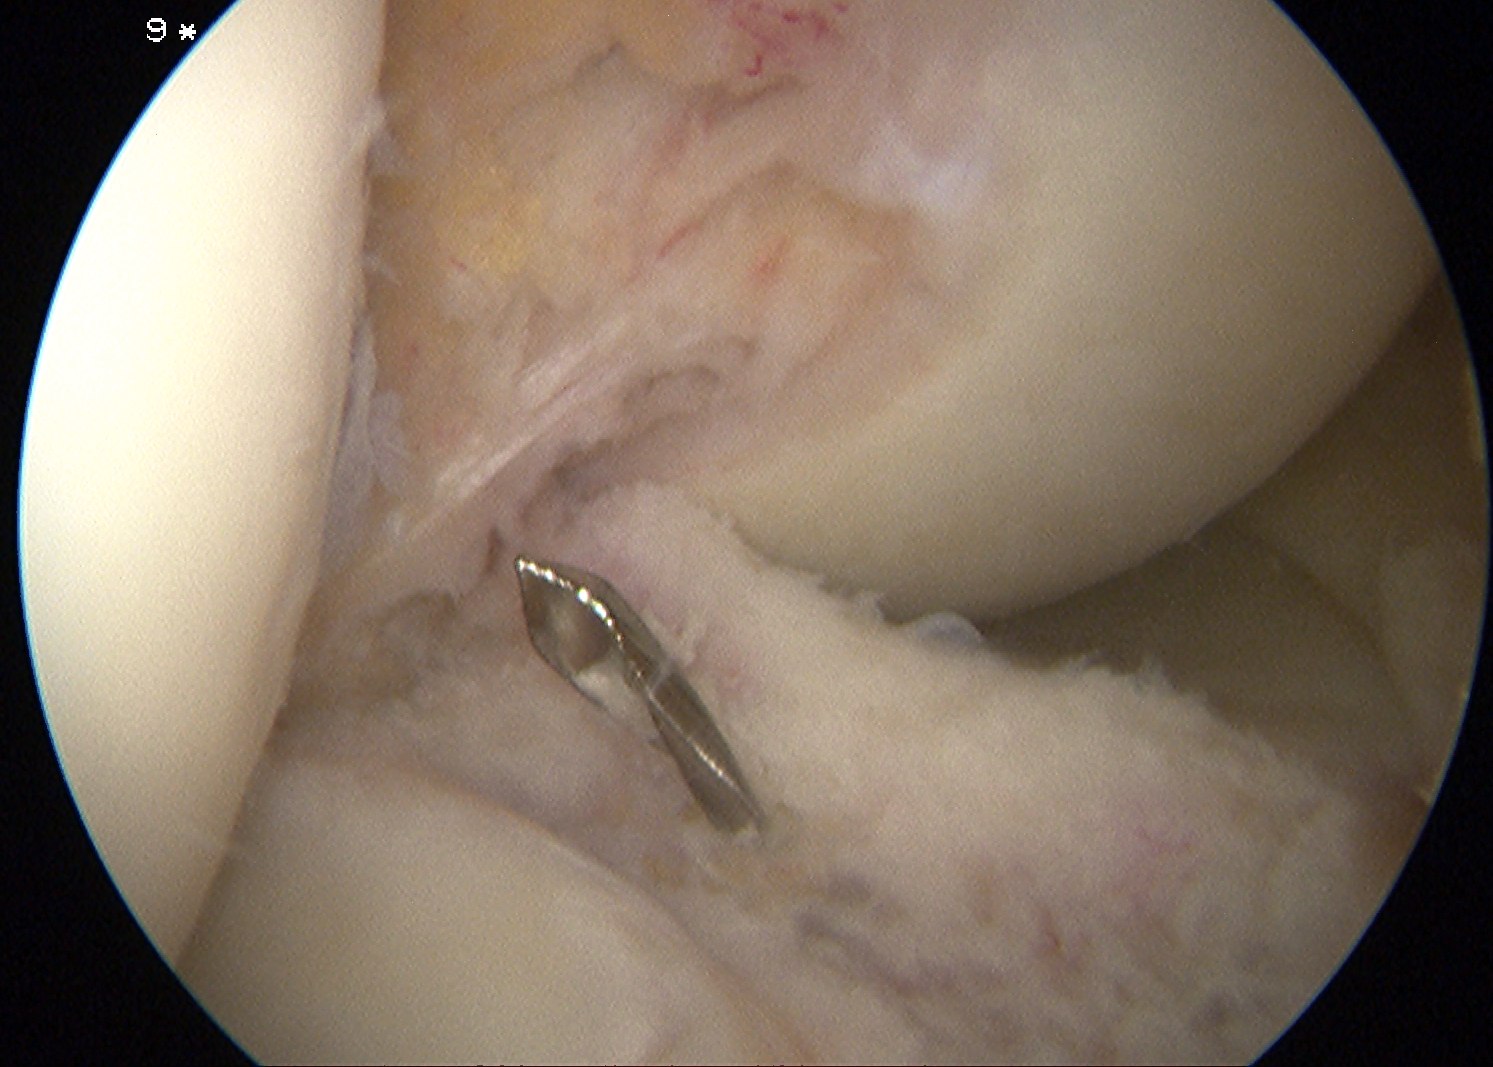
Debride ACL
Debride stump back to PCL fibres (preserve synovium over PCL)
- can leave some stump to identify tibial tunnel and provide vascularisation
- clean lateral wall
- remove periosteum with curette, chondrotome and electrocautery
- identify resident's ridge and posterior wall clearly
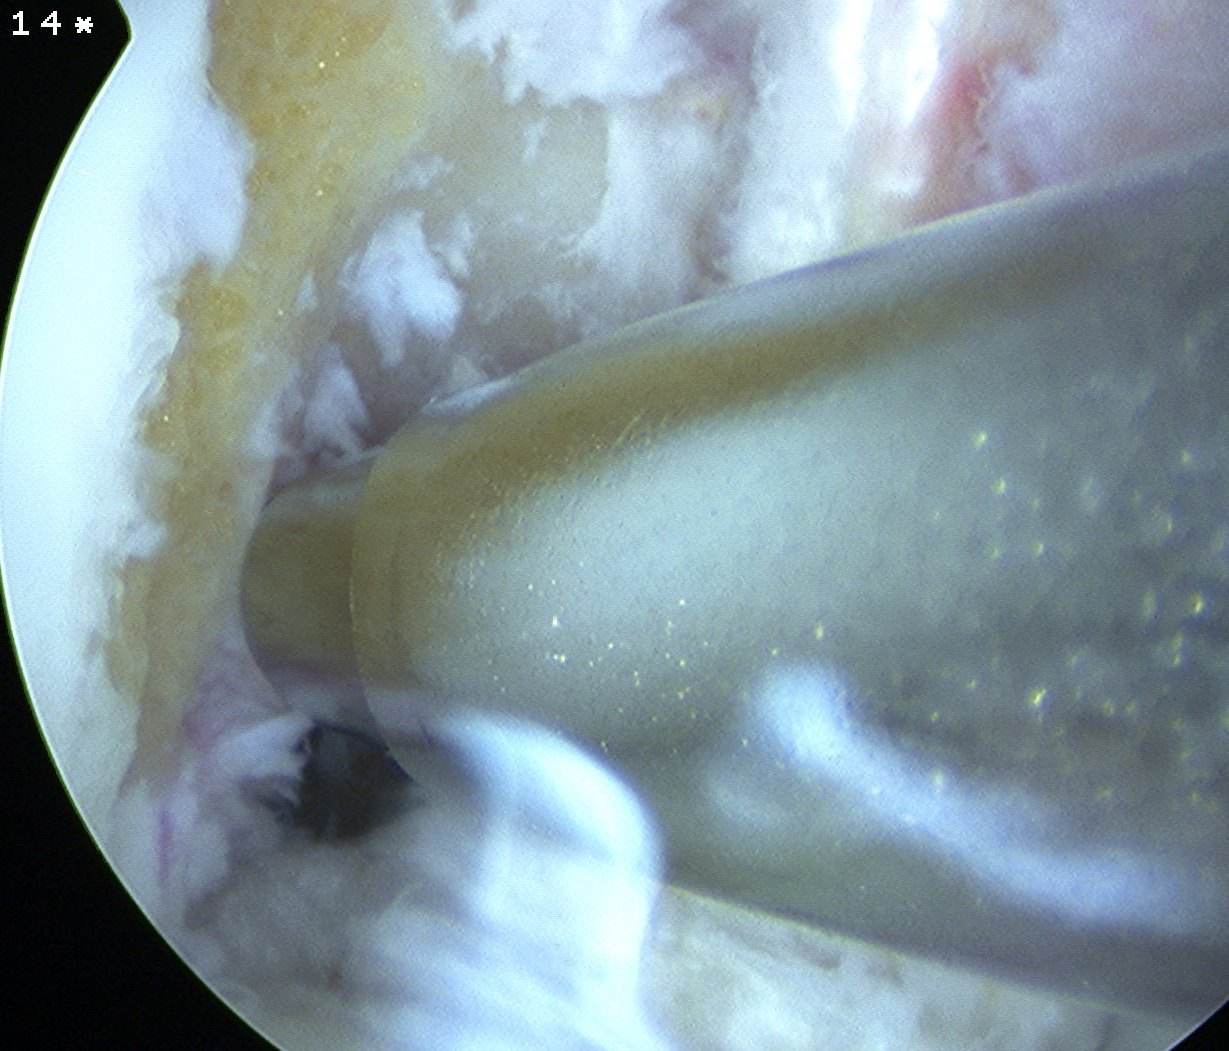
Femoral tunnel
Entry Point
- 1.30 o'clock on R, 10.30 o'clock on L
- 6 mm offset guide through anteromedial portal
- aim to leave 2 mm posterior wall
Femoral tunnel beath pin
- hyperflex knee, pass beath pin
- if don't hyperflex, tunnel can be very long
- want wire to emerge anterior to lateral intermuscular septum
- if tunnel too vertical, can emerge in PFJ
Femoral Tunnel Drilling
- pass 4.5mm endobutton drill completely through femoral cortex
- remove beath pin and insert depth gauge
- measure femoral tunnel (between 34 and 46 mm)
- drill appropriate sized tunnel with acorn reamer to within 10mm of cortex (for 20 mm endobutton)
- gives room to pull through and flip 10 mm endobutton
- if 15 mm endobutton need to be within 5 - 7 mm
- carefully clean out all bone fragments with shaver / depth gauge or may prevent graft passage
- insert loop 1 nylon to pass graft later

If blow out cortex, can also use extended endobutton
- wider than 10 mm
- often when this is pulled through, will go too far and lodge in vastus lateralis
- in which case cut down to endobutton and seat securely on femur
Tibial tunnel
Use drill guide set at 55o
- use < 55o if short graft
- entry medially through hamstring incision
- set for wire to exit either tip or elbow
- anterior to PCL
- posterior half of ACL stump
- identify medial tibial spine and anterior horn of lateral meniscus
- 2/3 along this line towards medial tibial spine
- pass beath wire
- drill tunnel line to line
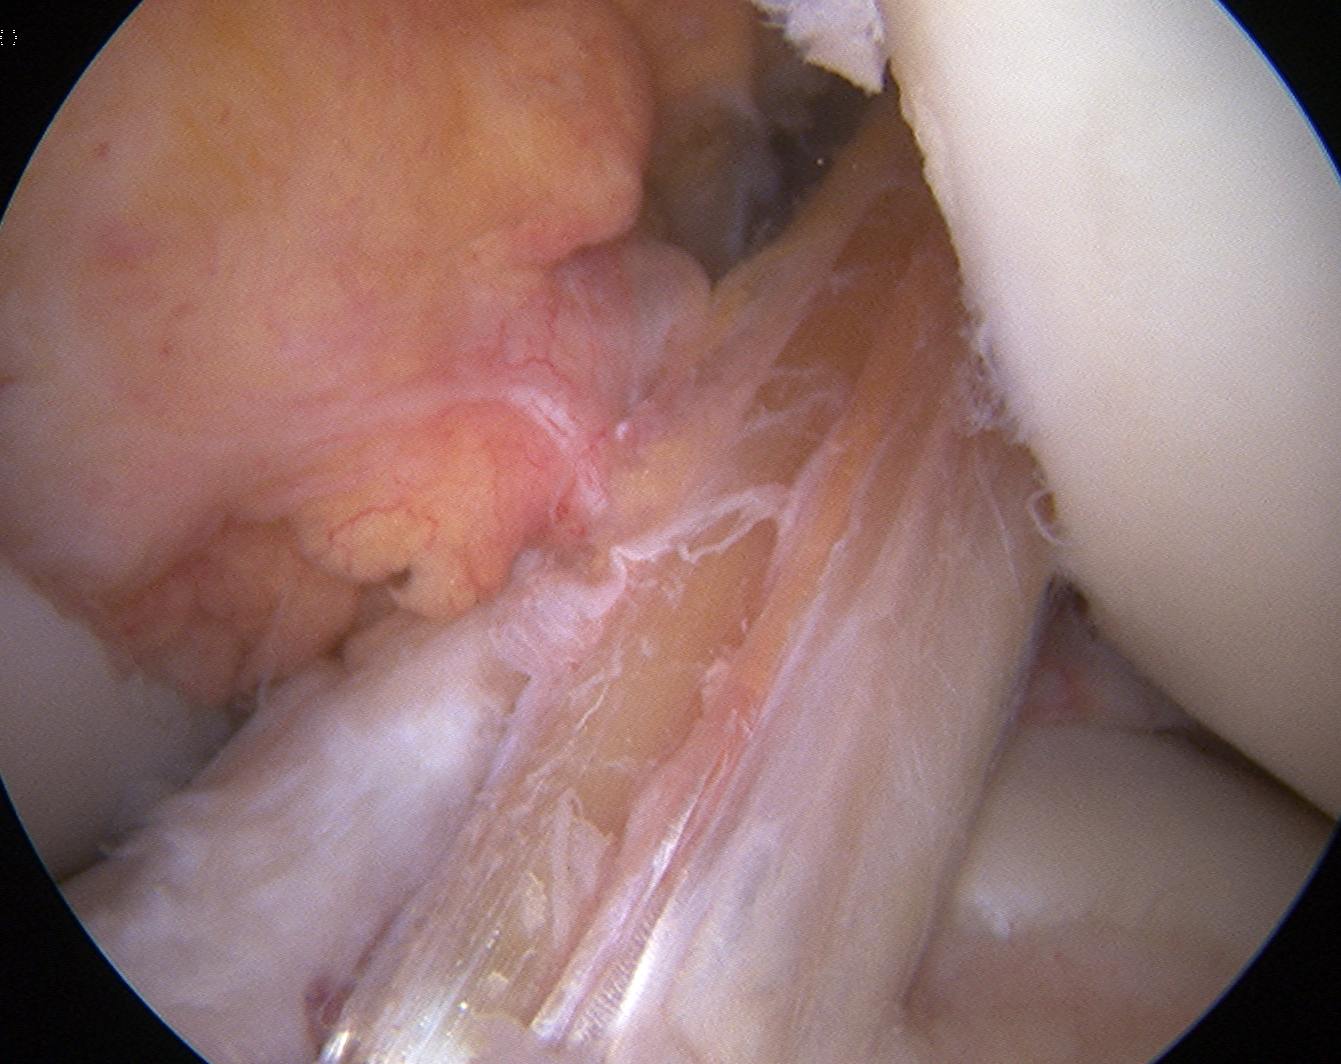
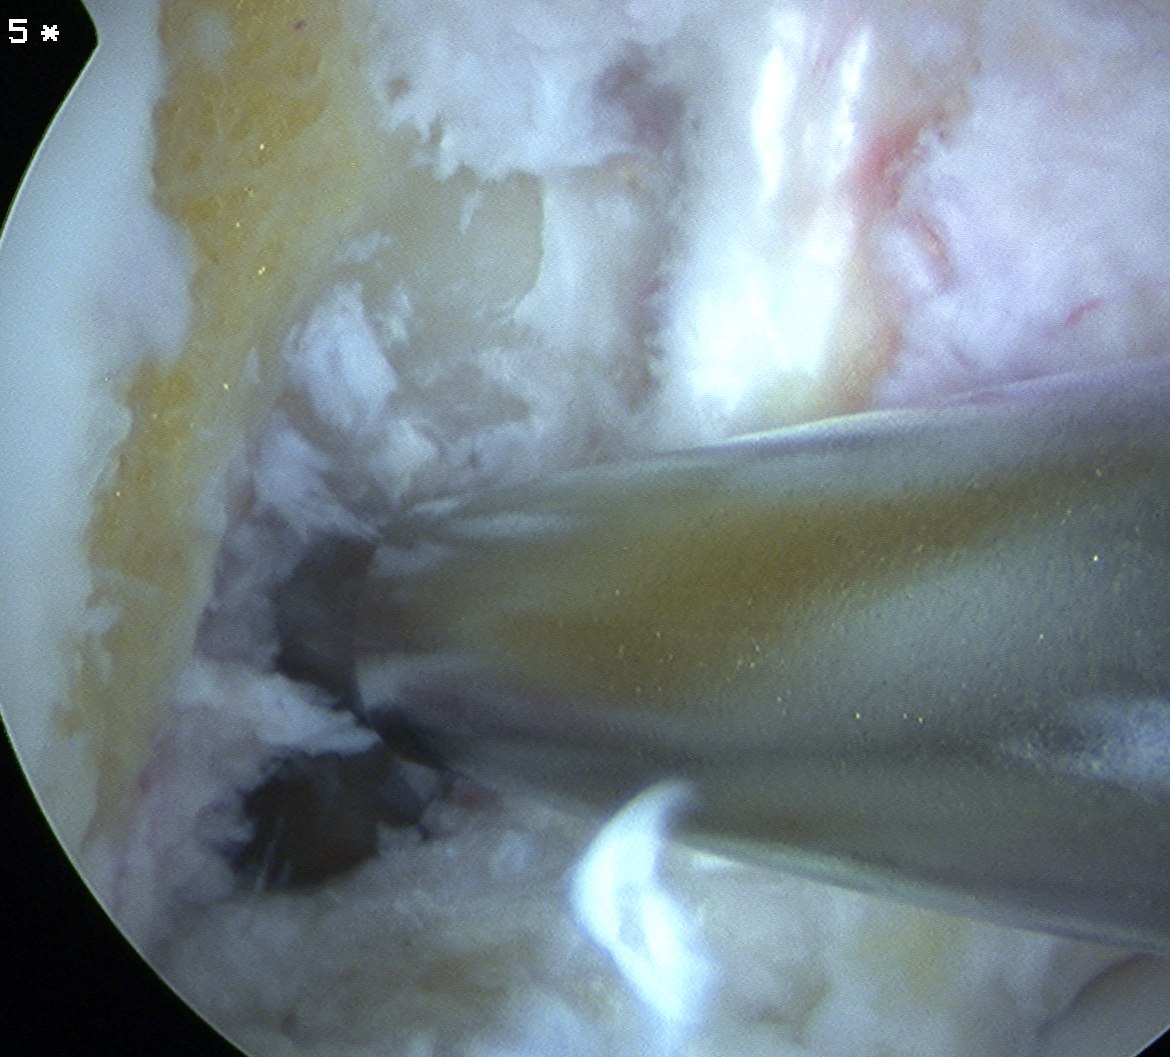
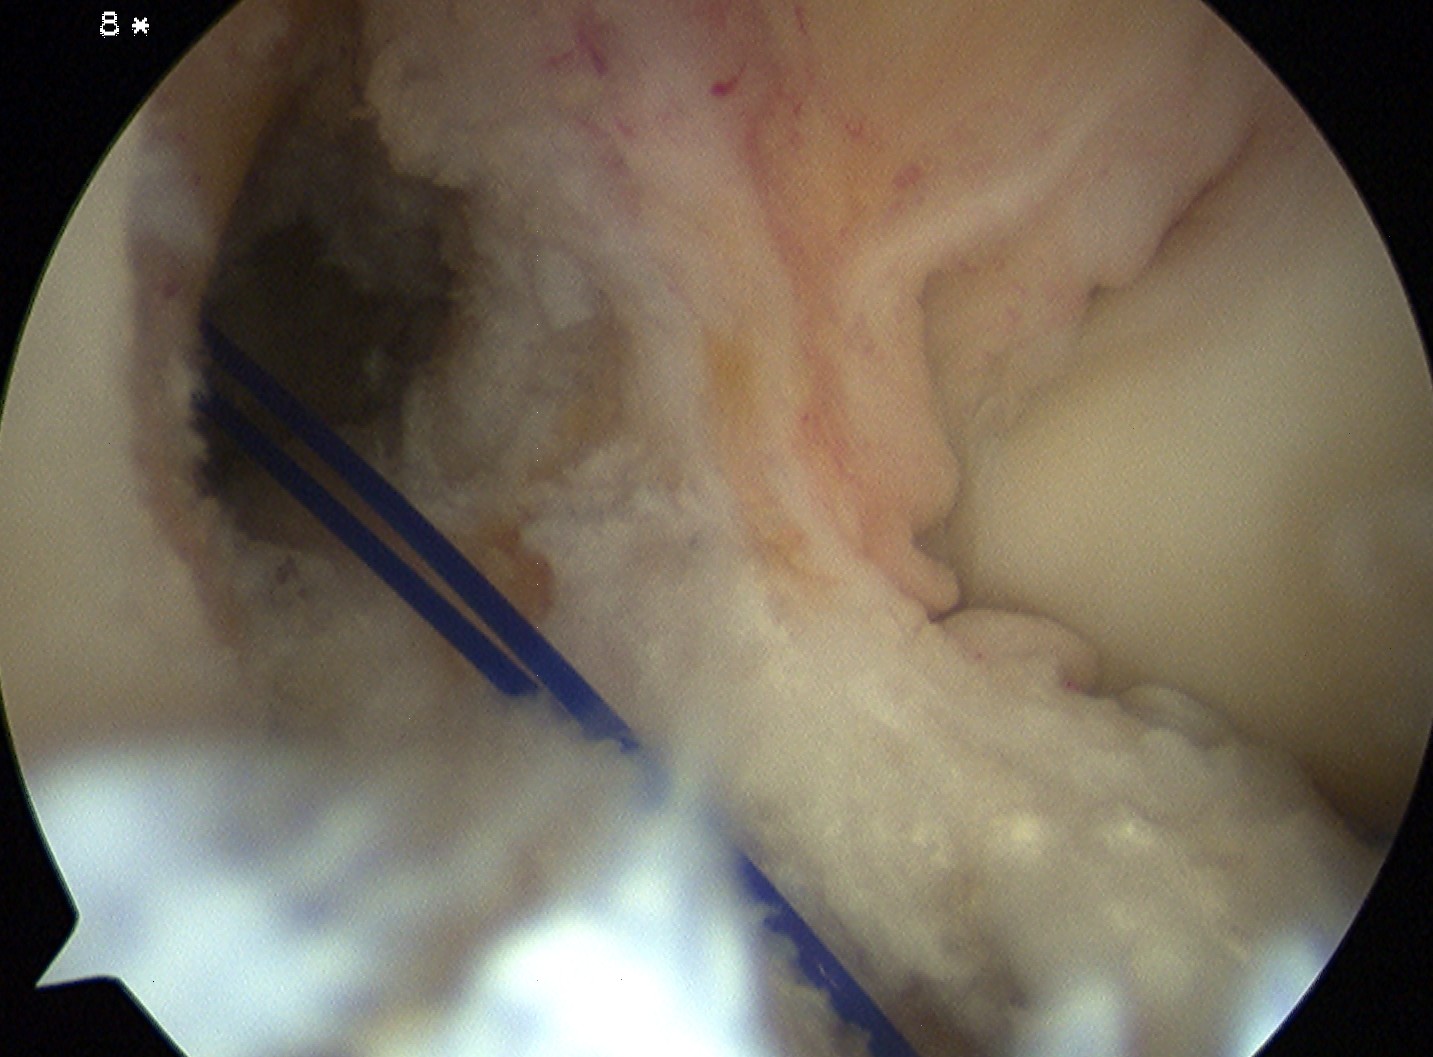
Pass Graft
Retrieve end of 1 nylon loop via tibial tunnel with grasper / probe
- place all 4 sutures of endobutton into loop and pull up through femoral tunnel
- separate sutures
- visualise femoral tunnel with camera
- use the pulling sutures to pull graft up into femoral tunnel
- helpful to wrap about artery forcep for traction
- then use both sutures to ensure that endobutton has flipped (rock each end back and forth)
- tension other end of graft and ensure cannot flip endobutton any further
Uncertain if endobutton has flipped
- check with II
- cut down on lateral femoral cortex
- supplement with interference screw
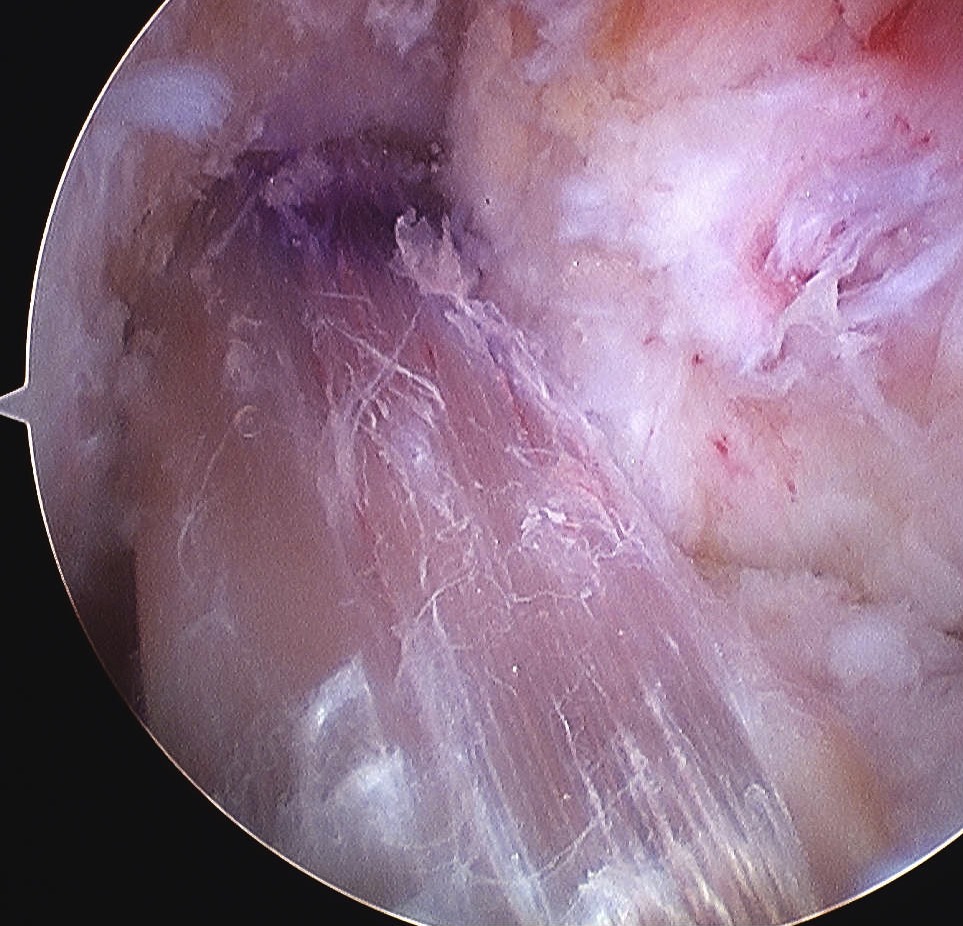
Tension graft
Hold distal sutures
- flex and extend multiple times
- check to see where graft is longest (i.e. pulled into knee)
- should secure graft where it is longest, or will have to stretch to get ROM back
- debate whether best at 0 or 30o
Washout Joint
Many bone fragments in joint
- may contribute to arthrofibrosis / cyclops / chondral damage
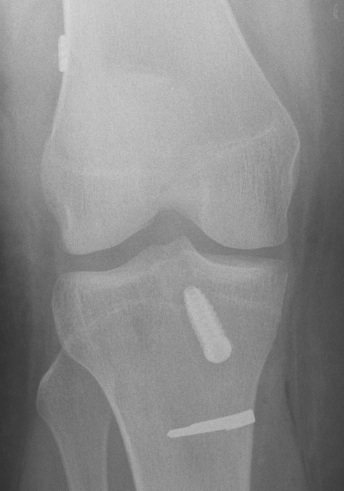
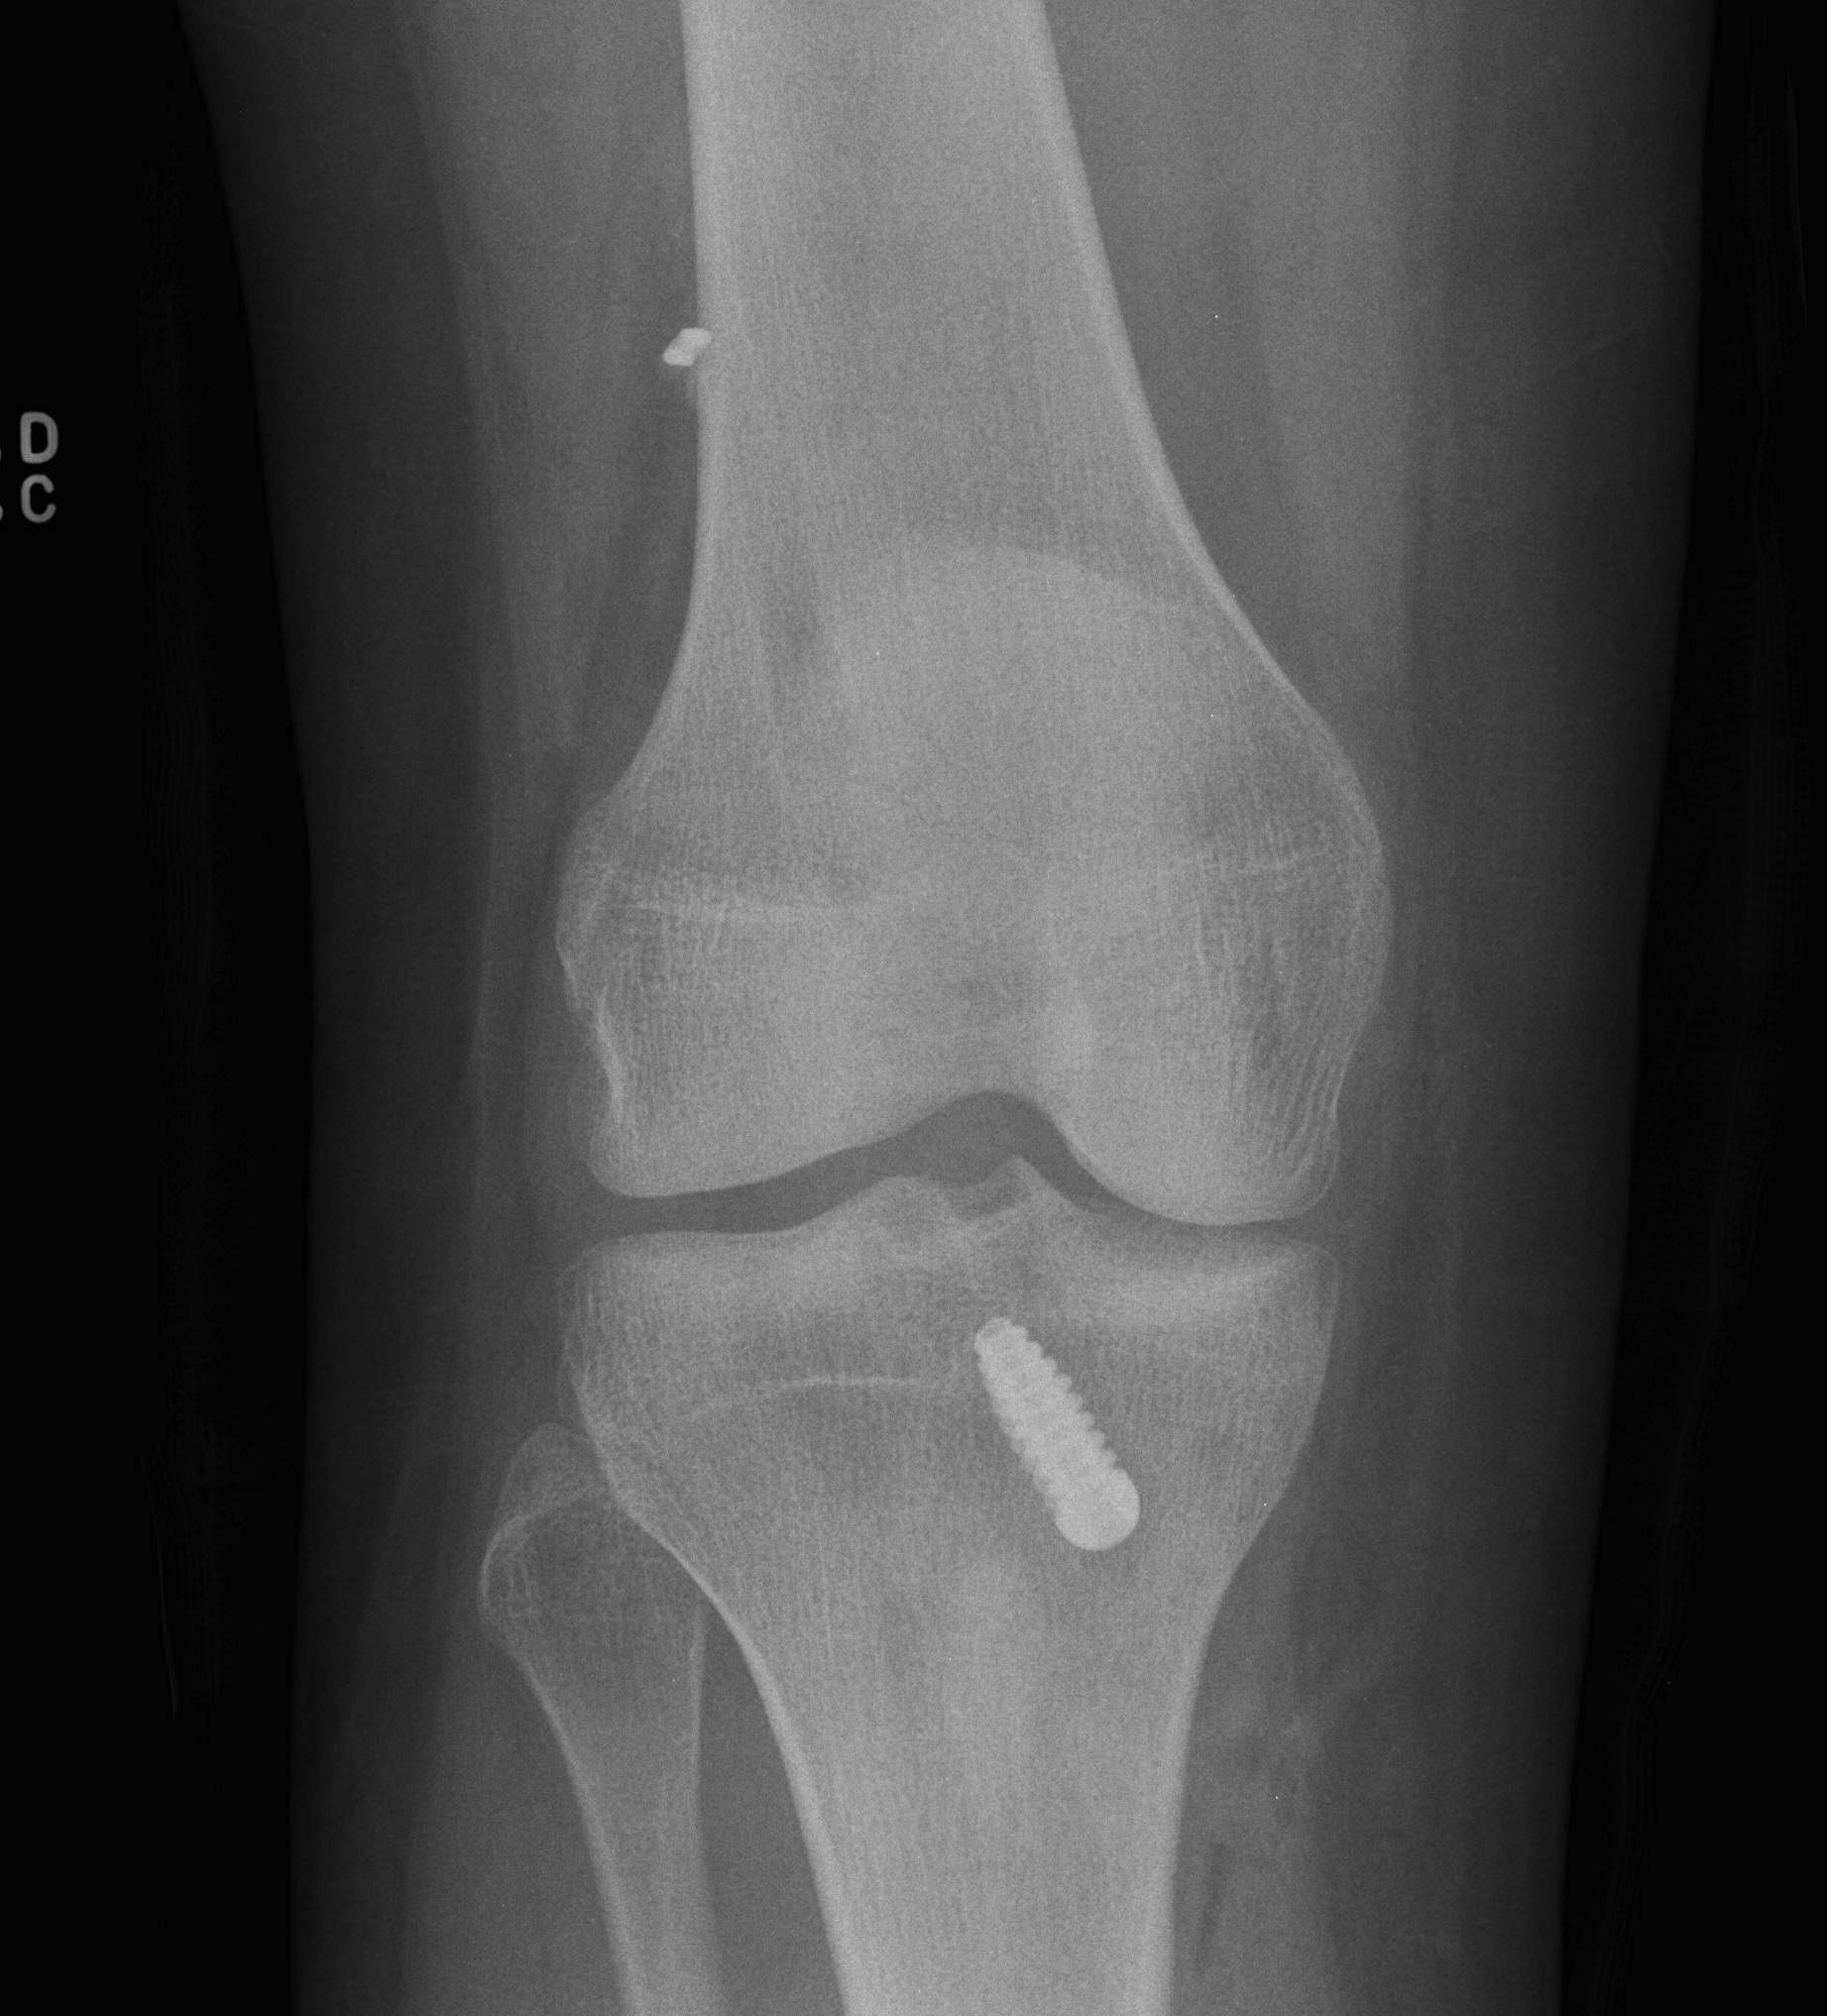
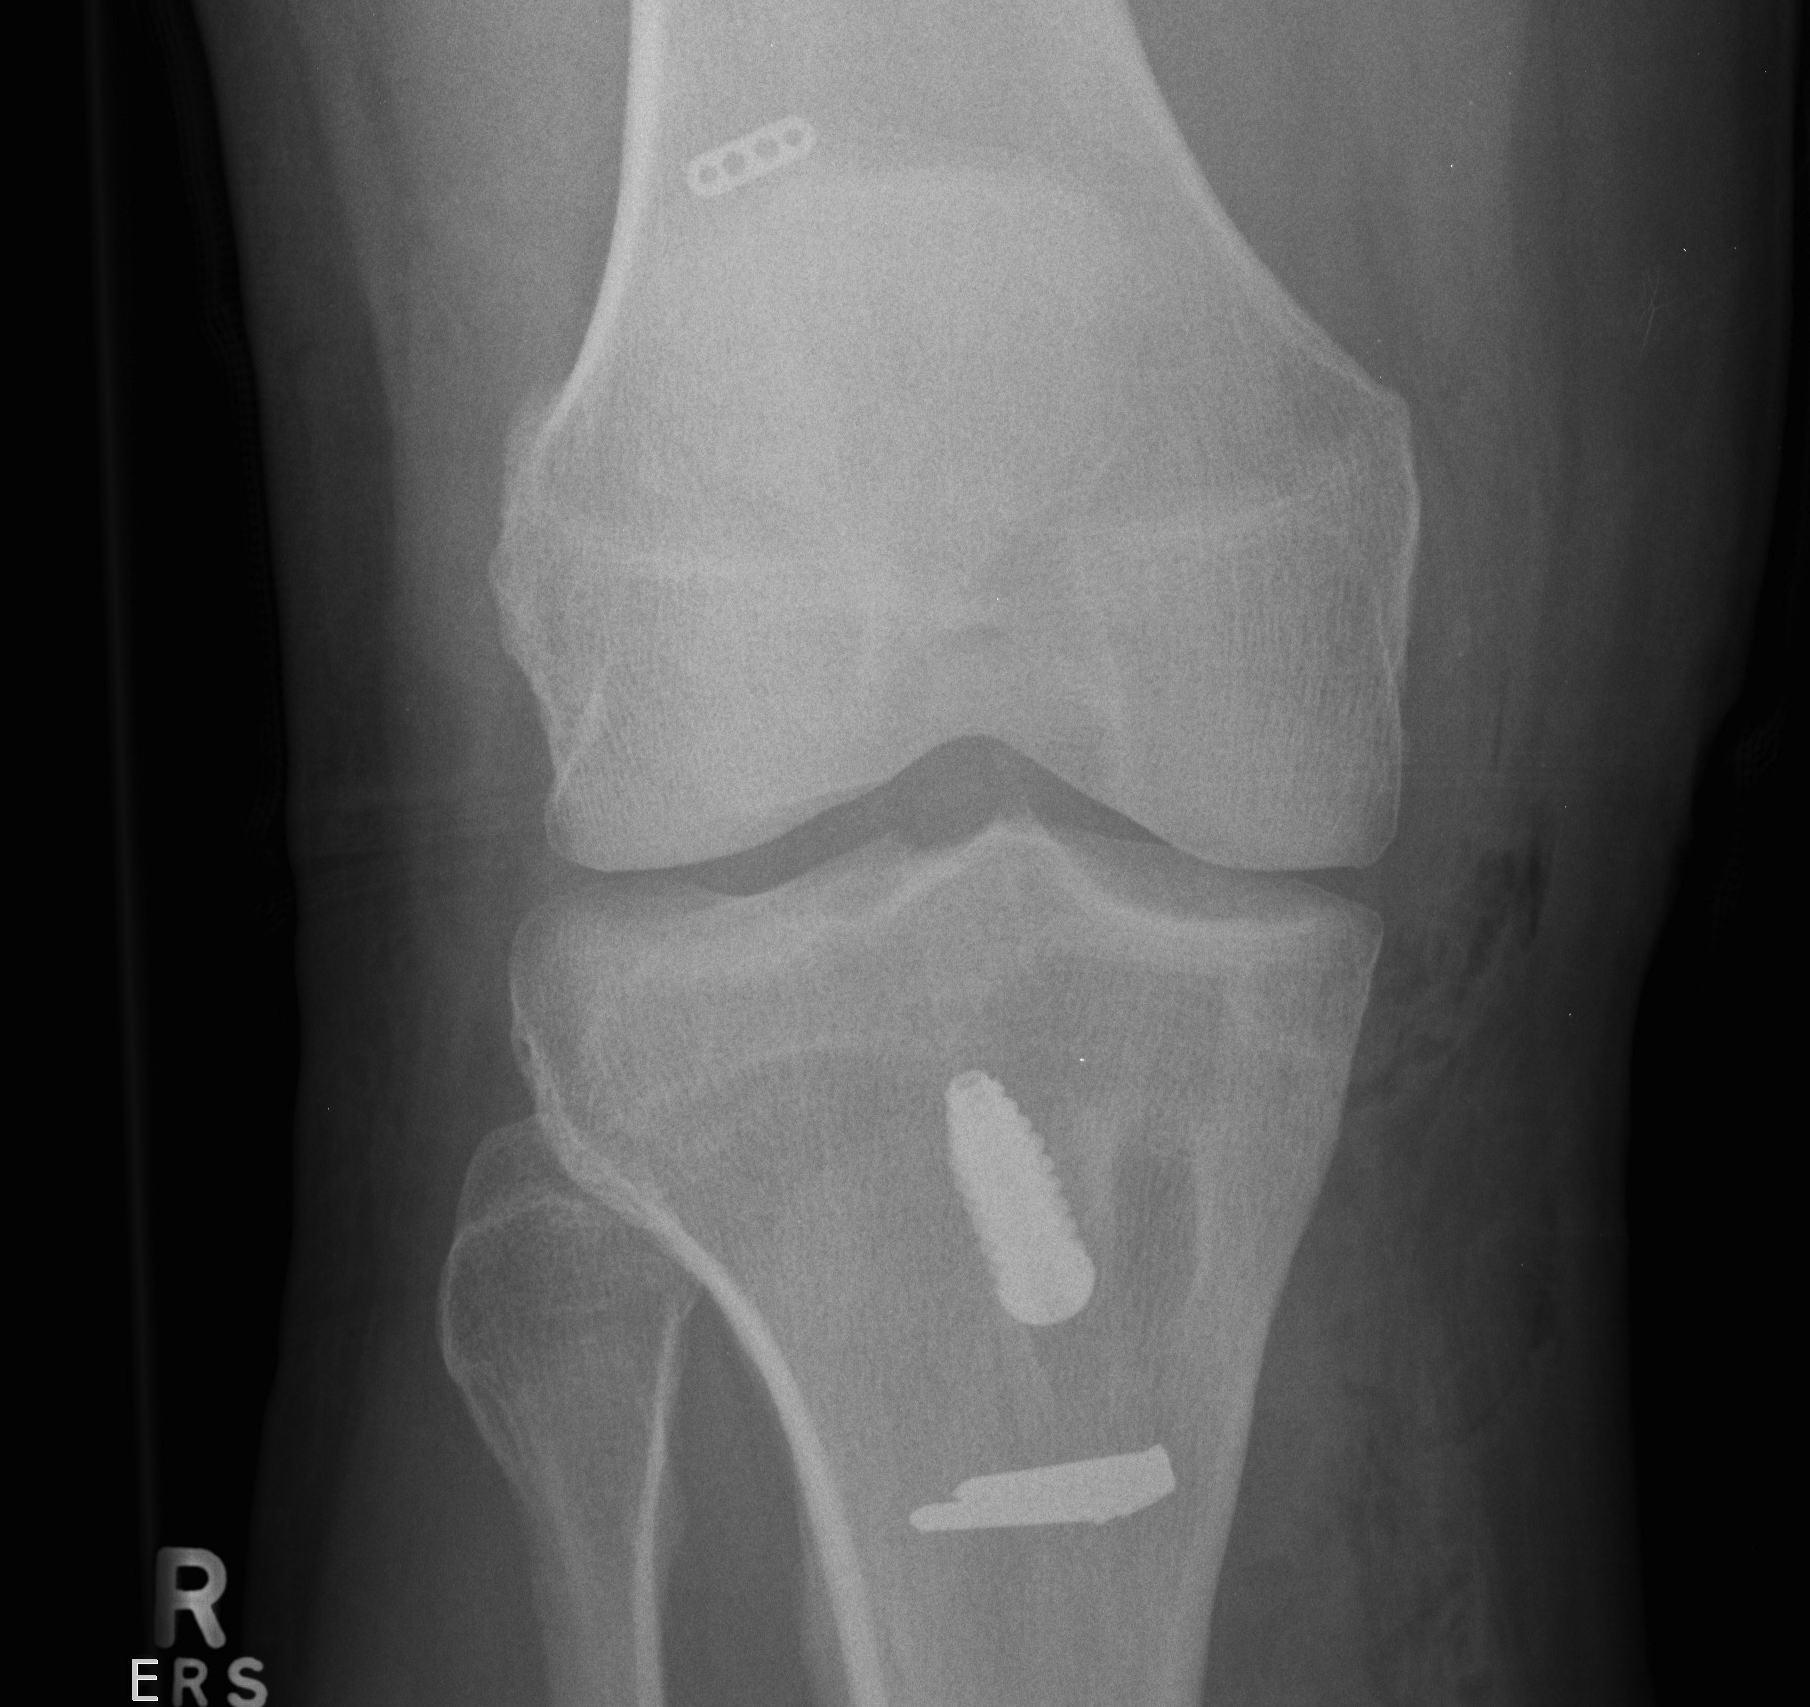
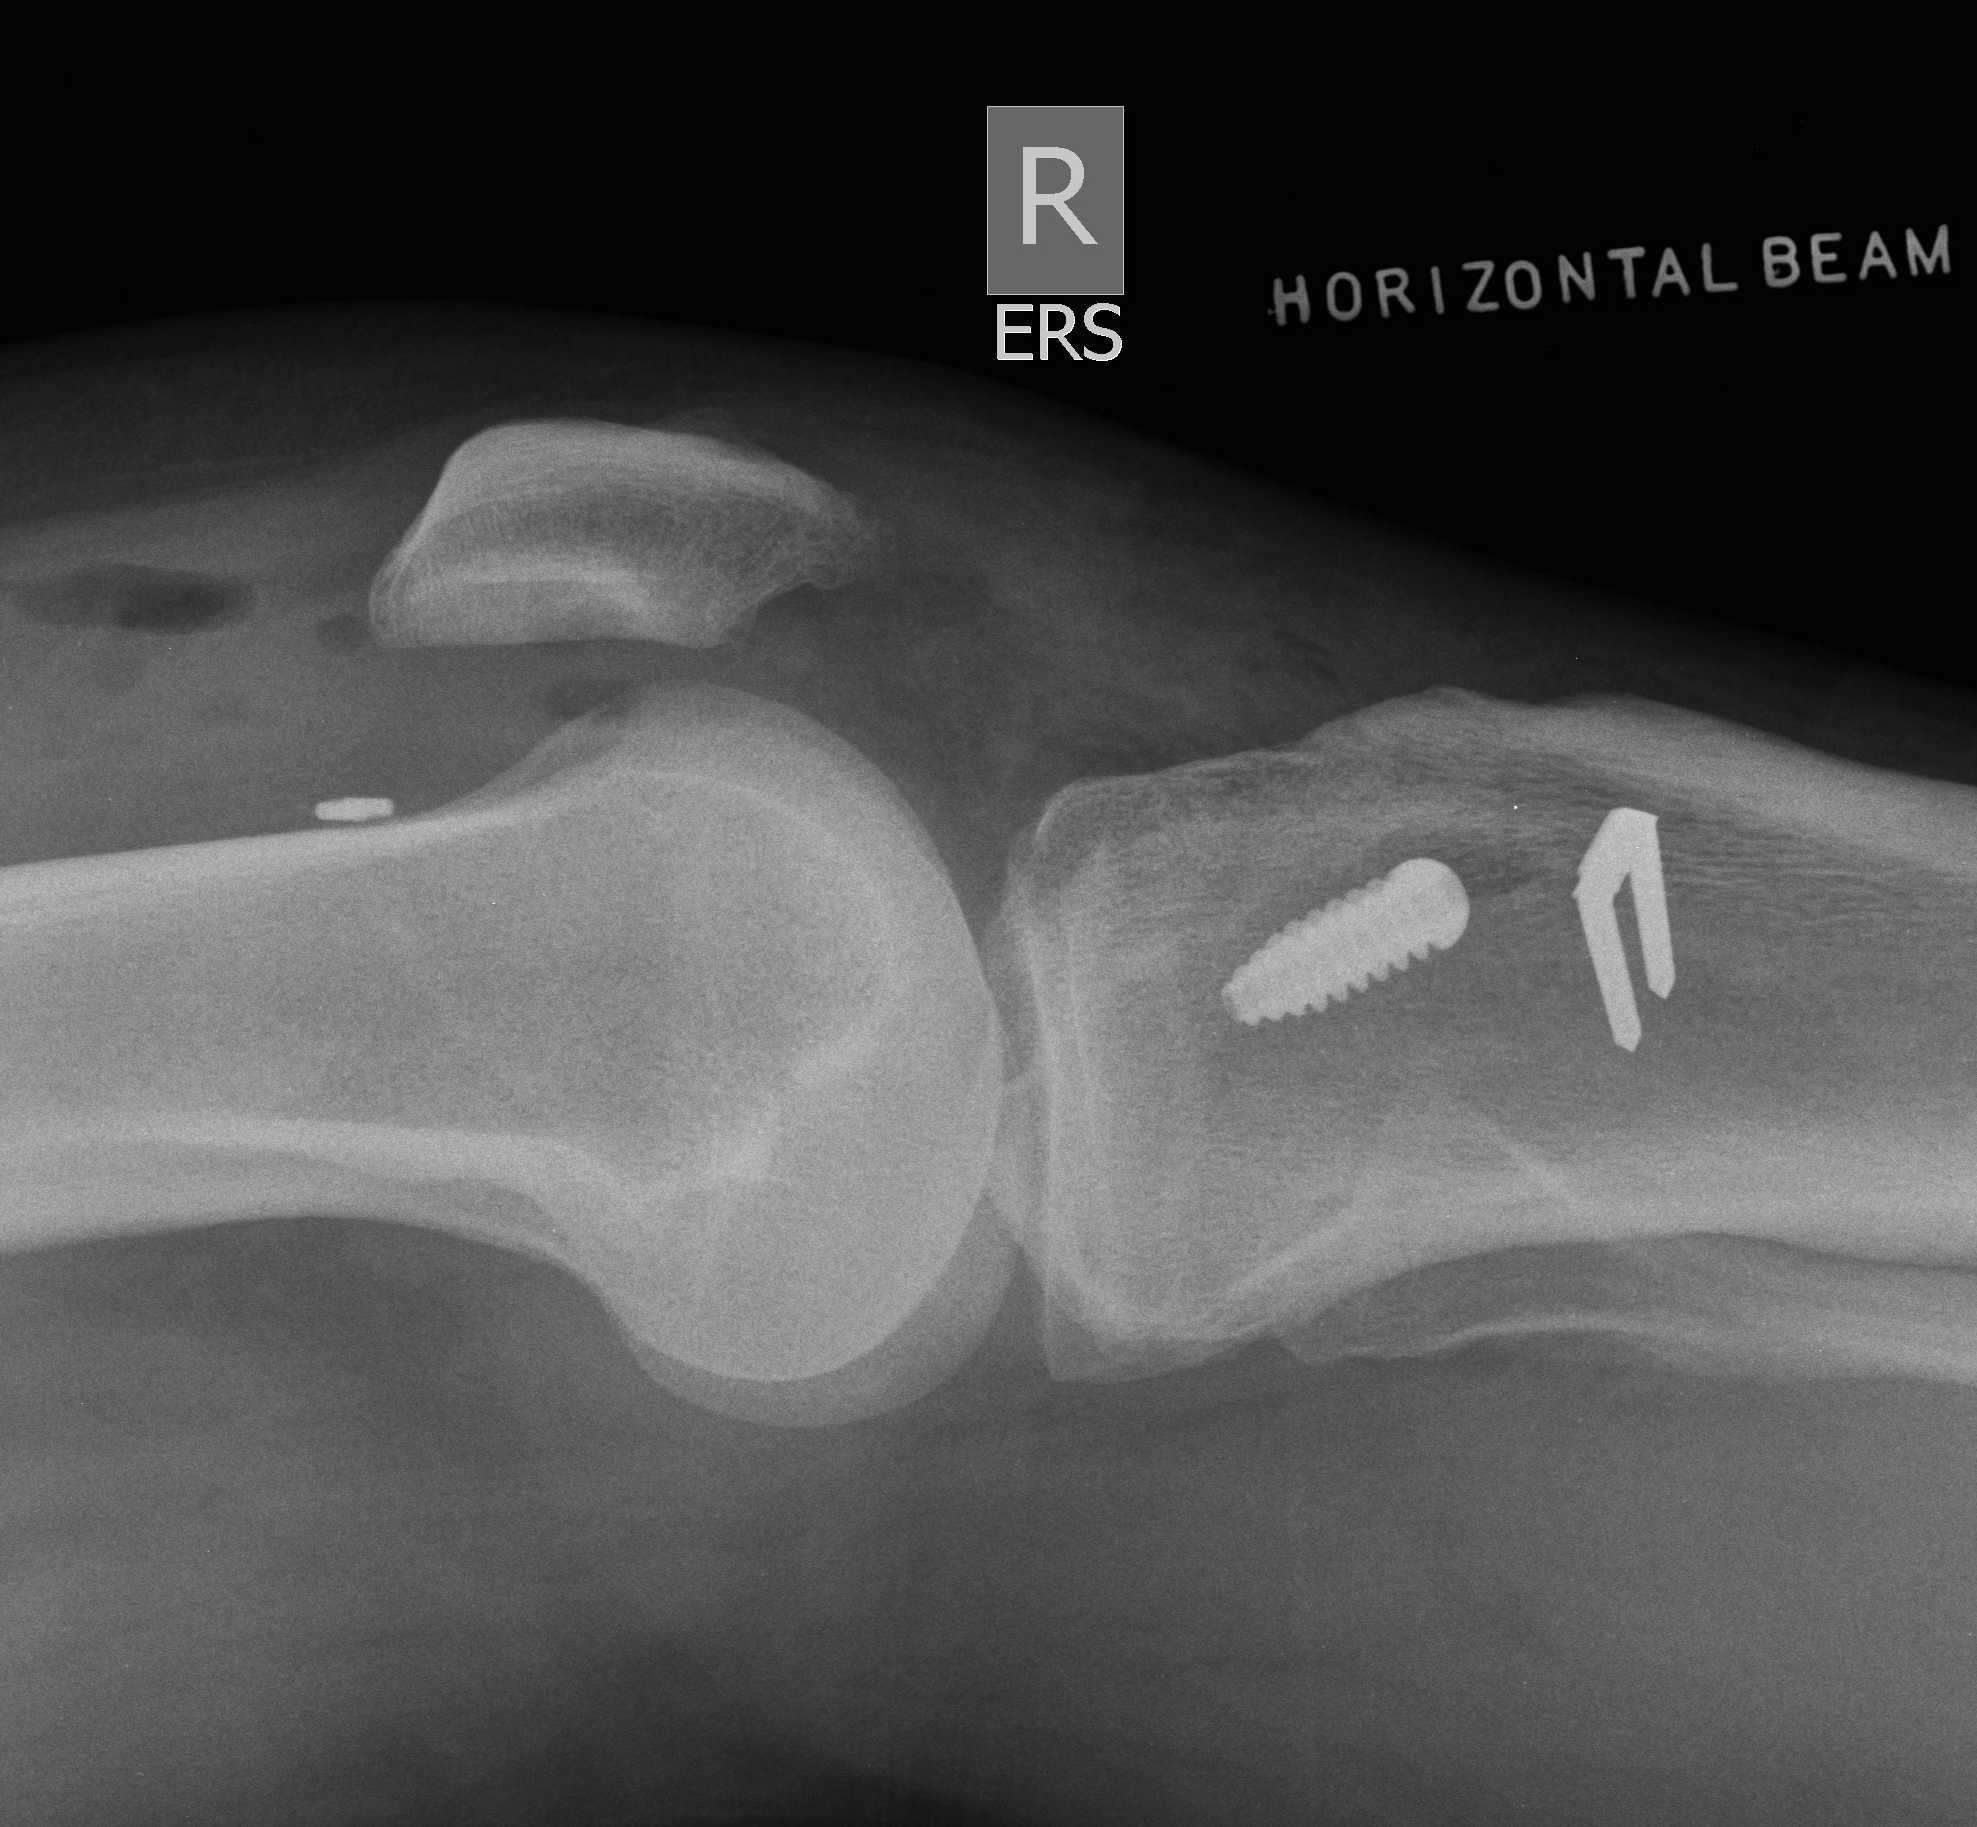
Tibial fixation
Place beath wire and pass RCI screw anteriorly
- usually 8 or 9 mm for men and women
- the tibial bone is soft
- will usually take a 25 mm screw / up to 35 mm
- +/- supplemental post / screw / staple
Range
Ensure no anterior or lateral impingement of graft
- can perform careful notchplasty

2 x RCI screws
Tunnels
Tibial tunnel
- as above
Femoral tunnel
- pass beath pin
- drill line to line for graft size
- usually 25 mm long
Pass graft
Insert screw
Femur
- forward thread RCI in left, reverse in right
- allow the head of the screw to always be visible (in case need to remove)
- always slightly smaller screw in femur as bone very hard
- i.e. 7 mm tunnel for 8 mm tunnel
Tibia
- tibial screw is 1 mm bigger i.e. 8mm for 7 mm tunnel