Goal
Head that translates 50% in all directions
- allows 30o ER with arm at side
- stable posteriorly
Pre-Op
Antibiotics
Cutibacterium acnes (formerly propionobacterium) cover
Tranexamic acid
- systematic review and meta-analysis
- 5 studies and 629 patients
- decreased hemoglobin change and drain output with TXA
Position
Beach-chair position
- McConnell head rest
- patient at table edge / removable edge
- shoulder must overhand table to allow GHJ extension
- need this to insert stem
Extended deltopectoral approach
Coracoid to deltoid insertion
Cephalic vein
- retracting cephalic vein laterally causes less bleeding
- retracting cephalic medially prevents cephalic avulsion from subclavian vein
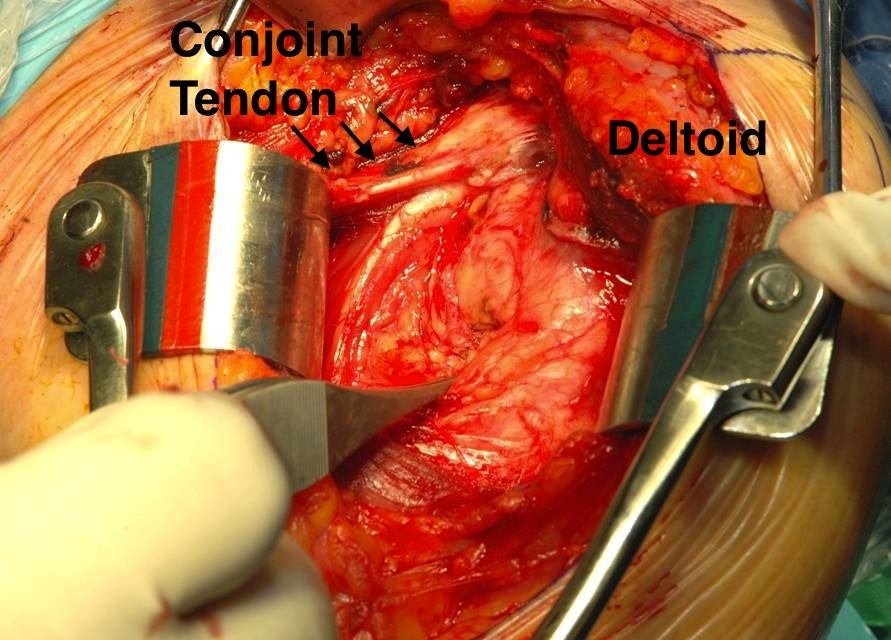
Deep dissection
- divide clavipectoral fascia on lateral edge conjoint tendon
- replace medial retractor blade under conjoint tendon
- externally rotate humerus and expose subscapularis
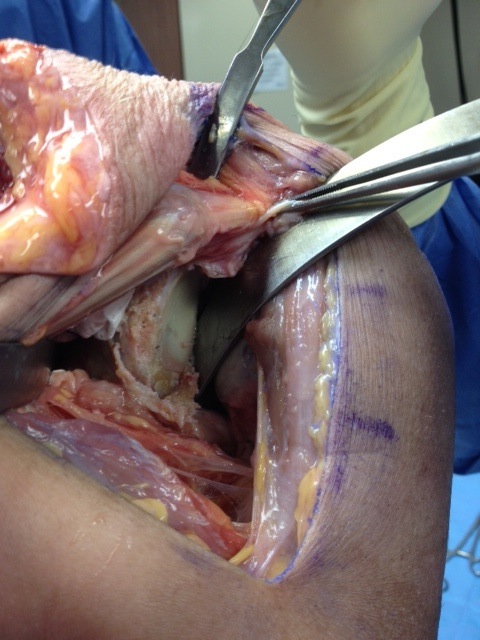
Deltopectoral approach left shoulder
Identify and release biceps and open rotator interval
Identify and tag biceps tendon
- lateral edge of subscapularis
- divide
- tenodesis to soft tissue
Identify the interval between subscapularis and supraspinatus
Open rotator interval at superior border of subscapularis
Additional Releases
1. Coraco-acromial ligament
- place retractor on coracoid
- don't divide in full or risk superior escape of humeral component
- take anterior triangle with diathermy
2. Pectoralis major insertion
- divide upper 50%
- can release more if needed, but repair at end
- allows ER of humerus
3. Release Lat Dorsi / Teres Major if needed
- externally rotate humerus
- identify inferior to lower border of subscapularis and anterior circumflex vessels
- subperiosteal dissection with diathermy
4. Release anterior deltoid
5. Can release conjoint tendon if needed
- usually via coracoid osteotomy
- predrill
- secure with screw later
Subscapularis
Identify lower border of SSC
- anterior circumflex humeral blood vessels
- at inferior SSC tendon
- can tie off with stay sutures
Options
Subscapularis tenotomy
Lesser tuberosity osteotomy
Subscapularis peel
Subscapularis sparing
A. Subscapularis tenotomy
Advantage
- easy to do
Disadvantage
- tendon healing - need to protect ER post operatively
- risk of weakness
- potential for shortening
Technique
- insert medial stay sutures
- divide subscapularis and capsule medial to lesser tuberosity
- leave cuff of subscapularis medially for repair
- repair with arm in 30o external rotation
B. Lesser tuberosity Osteotomy
Advantages
- bone to bone healing may be more reliable
Technique
- expose inferior humeral flare
- don't want inferior cut venturing into humeral shaft / is a fracture risk
- use oscillating saw beginning in intertubercular groove
- usually small 2 cm oval piece
- place ethibond stay sutures
- repair with sutures
C. Subscapularis peel
Technique
- release SSC tendon and capsule off the insertion
- repair SSC at end via drill holes or with anchor
- 68 subscap tenotomy versus 65 subscap peel versus 55 LT osteotomy
- no difference in outcomes at 2 years
- 2 patients with subscap peel required reoperation for subscap failure
- RCT 100 patients SSC tenotomy versus SSC peel
- no difference in outcome, healing, or internal rotation strength
D. Subscapularis sparing
Insert prosthesis via rotator interval
- RCT of SSC sparing versus SSC tenotomy
- no differences in outcomes or complications
Subscapularis releases
Used to be 360o release
- fatty infiltration post operatively was identified on MRI
- thought to be due to denervation anteriorly
180o release
- superior release - superior glenohumeral ligament and coracohumeral ligament from superior border of subscapularis
- posterior release - dissect away and resect capsule from posterior border of subscapularis
- inferior release - inferior glenohumeral ligament
- ensure good excursion of subscapularis
Humeral Osteotomy
Releases
- externally rotate humerus to put tissues on tension
- release capsule anteriorly all the way posteriorly
- may need to release lat dorsi and teres major tendon
- deliver humeral head by extending and externally rotating
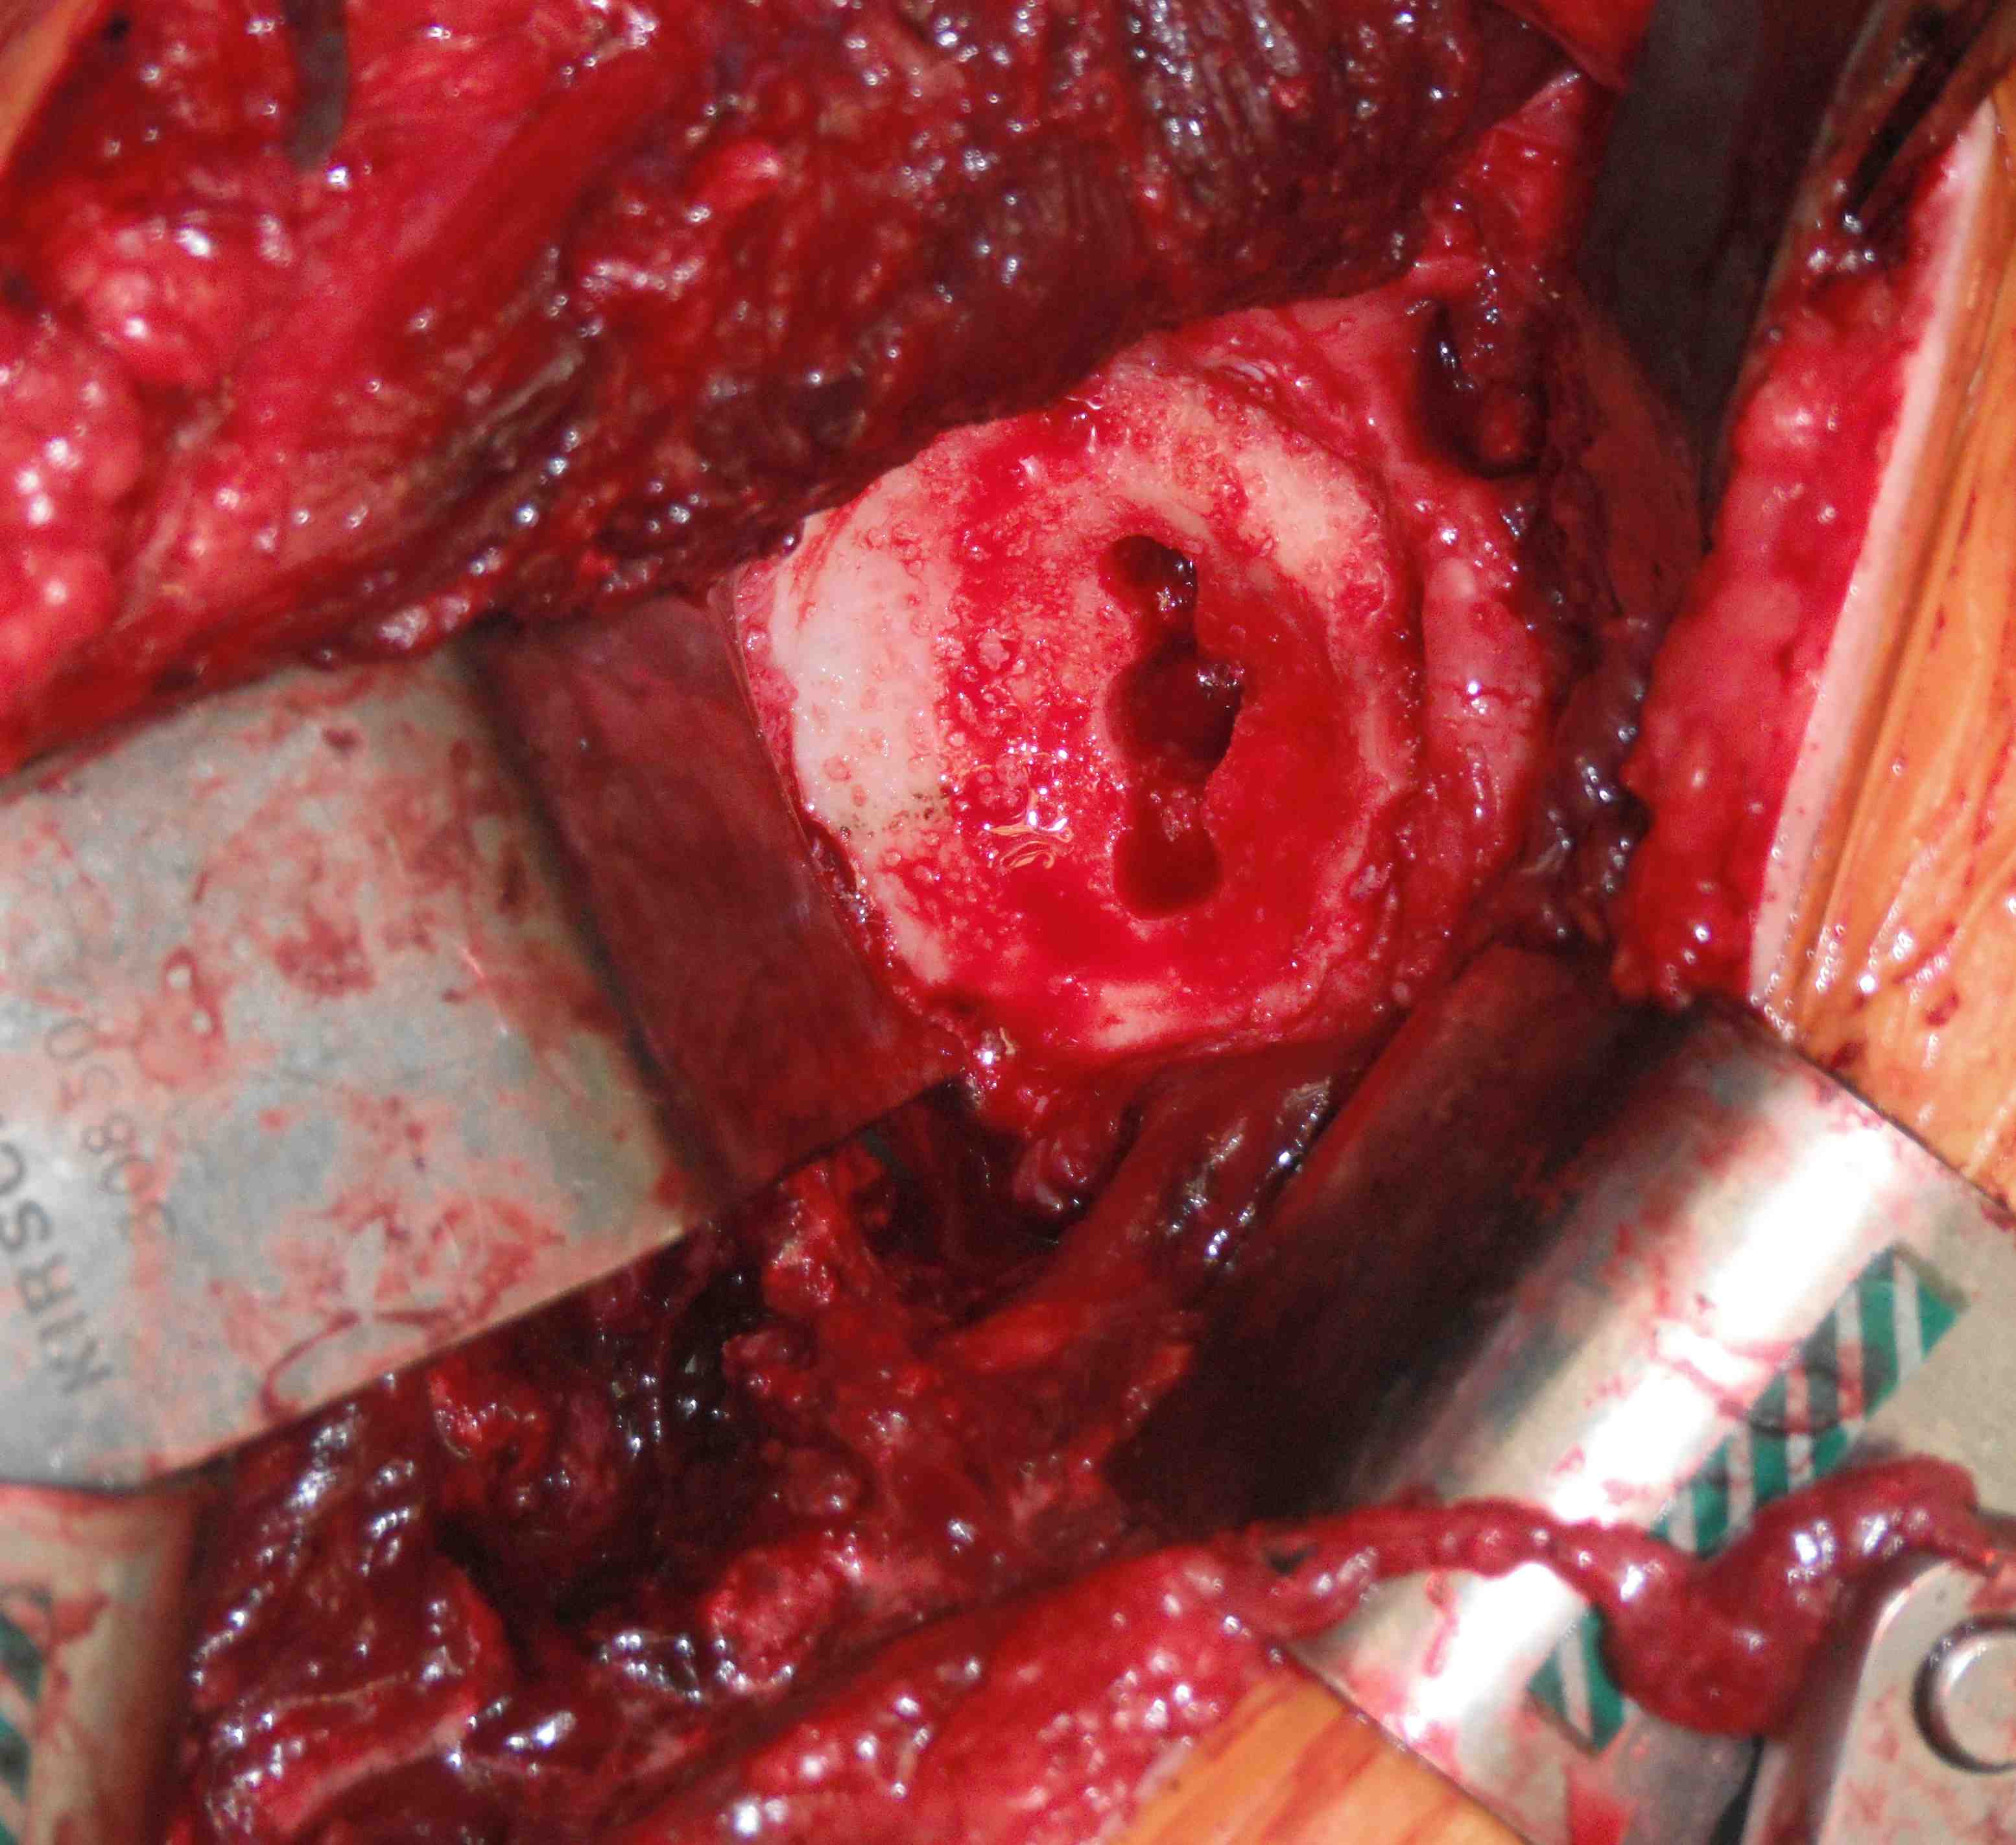
Humeral osteotomy
- identify true anatomical neck which is osteotomy site
- usually need to remove humeral head osteophytes
- posterior retractor to protect rotator cuff
- anterior retractor to protect glenoid
- use saw to resect articular cartilage in line with anatomical neck
- broach humerus as needed
- insert trial stem as leaving the stem in prevents fractures while preparing the glenoid
- placing a cap on the stem on prevents crushing cancellous bone
Glenoid Exposure
Releases
Resect superior / anterior / posterior labrum
Release inferior labrum from bone while protecting axillary nerve
Continue humeral neck release
- release capsule around neck all the way to posterior aspect
Retractors
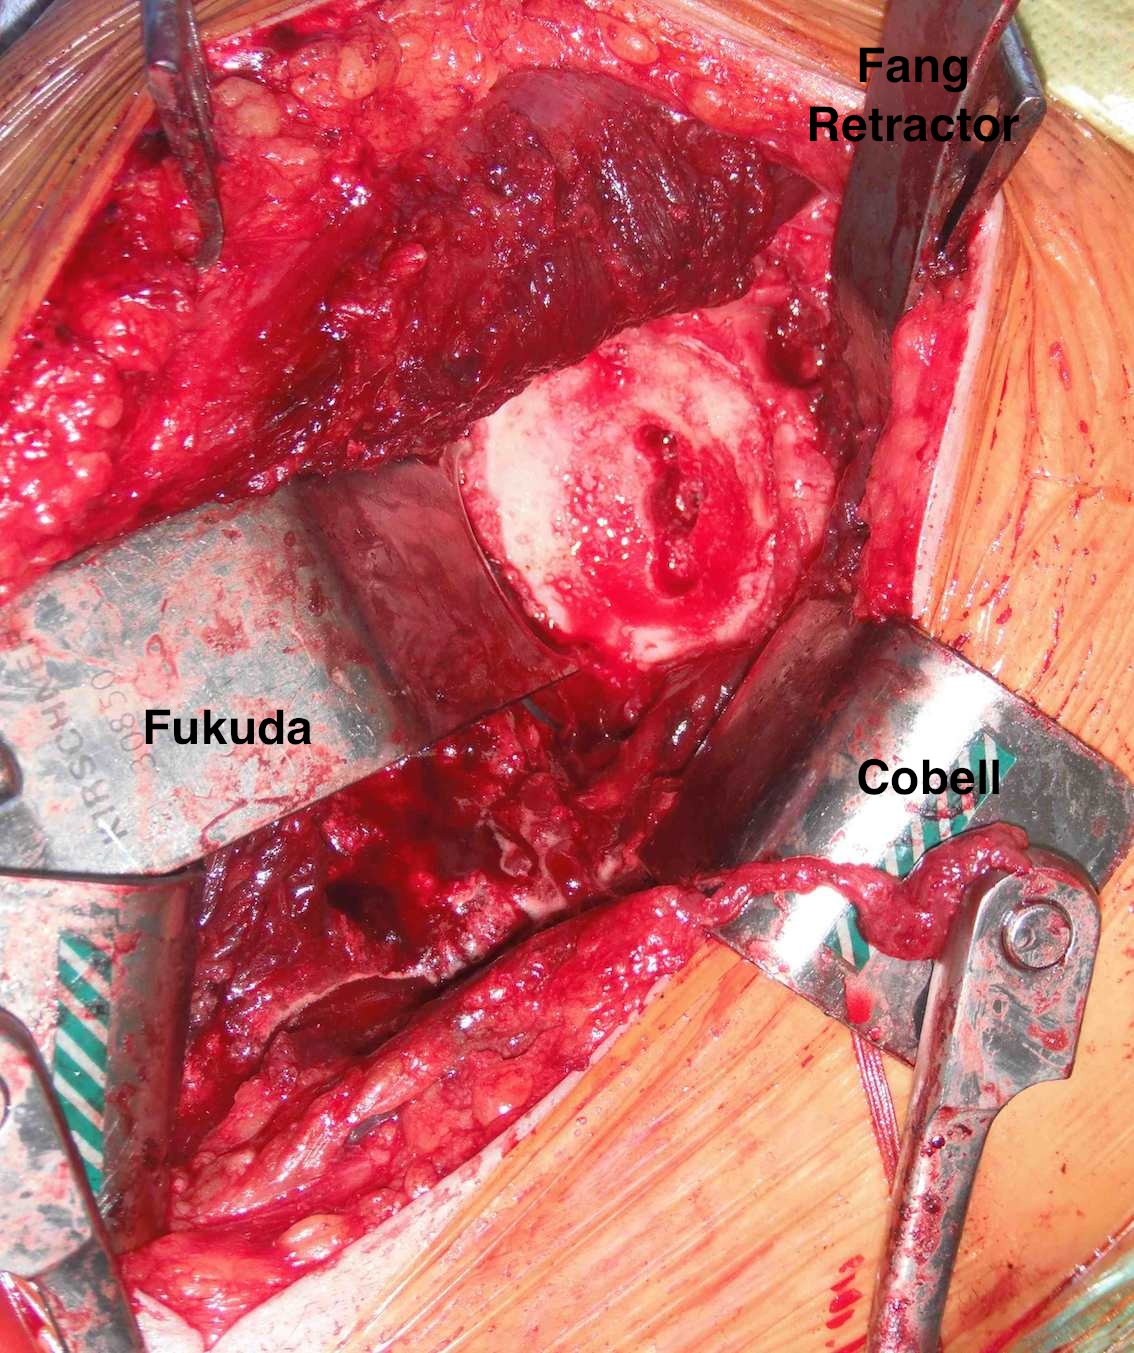
Anterior retractor under subscapularis
Posterior retractor
- humerus is flexed, internally rotated
- head pushed posteriorly
Interior retractor to protect axillary nerve
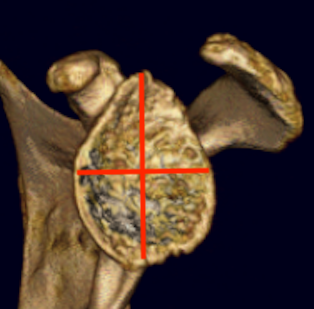
Glenoid component
Glenoid center point crucial
Vault is a triangle
- pilot hole critical
- must not penetrate vault with keel or peg drilling
- get vault perforation / blowout
- cannot pressurise cement
Vault blowout / perforation
1. Freehand technique
- identify center of glenoid articular surface
- glenoid center point slightly inferior and anterior to center of the articular surface glenoid
- match inclination of glenoid
- insert guide pin aiming anteriorly

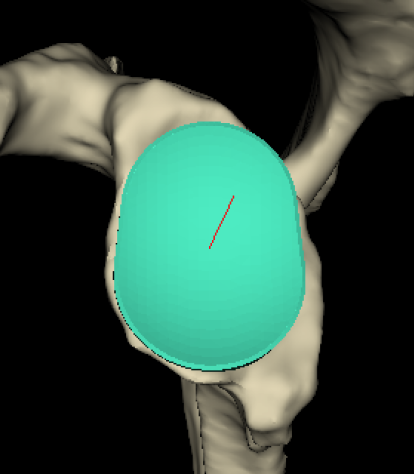
2. 3D CT templating
- templates glenoid component
- creates guide that matches glenoid
- allows placement of guide pin
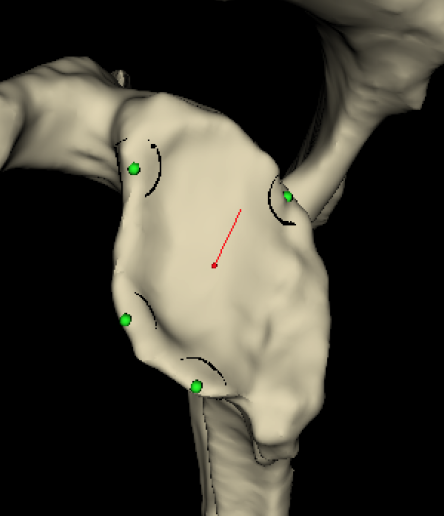
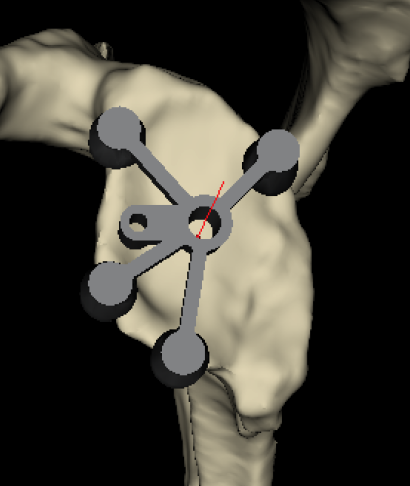
Insert guide pin
- ream only articular cartilage
- preserve subchondral bone
- reamers often semi-circle to aide insertion and removal
Ream peg / keel
- ensure no blowout with arthroscopy probe
Glenoid cementing
- keep holes dry
- insert cement into peg / keel holes using syringe
- no cement under poly as is generally too thin and will crack
- pressurise
- insert poly
Humeral component
Modern components
Variety of thickness options of humeral head
- overstuffing of joint reduces ROM and places excessive stress on rotator cuff
Offset options
- normal head offset from neck posteriorly and medially
- placing head more anterior than normal can impinge on SSC and cause late rupture
Trial
Should be able to
A. Inferiorly sublux head 50% glenoid and return to center
B. Posteriorly sublux head 50% and return to center
C. Able to close subscapularis without impingement on head