Goal 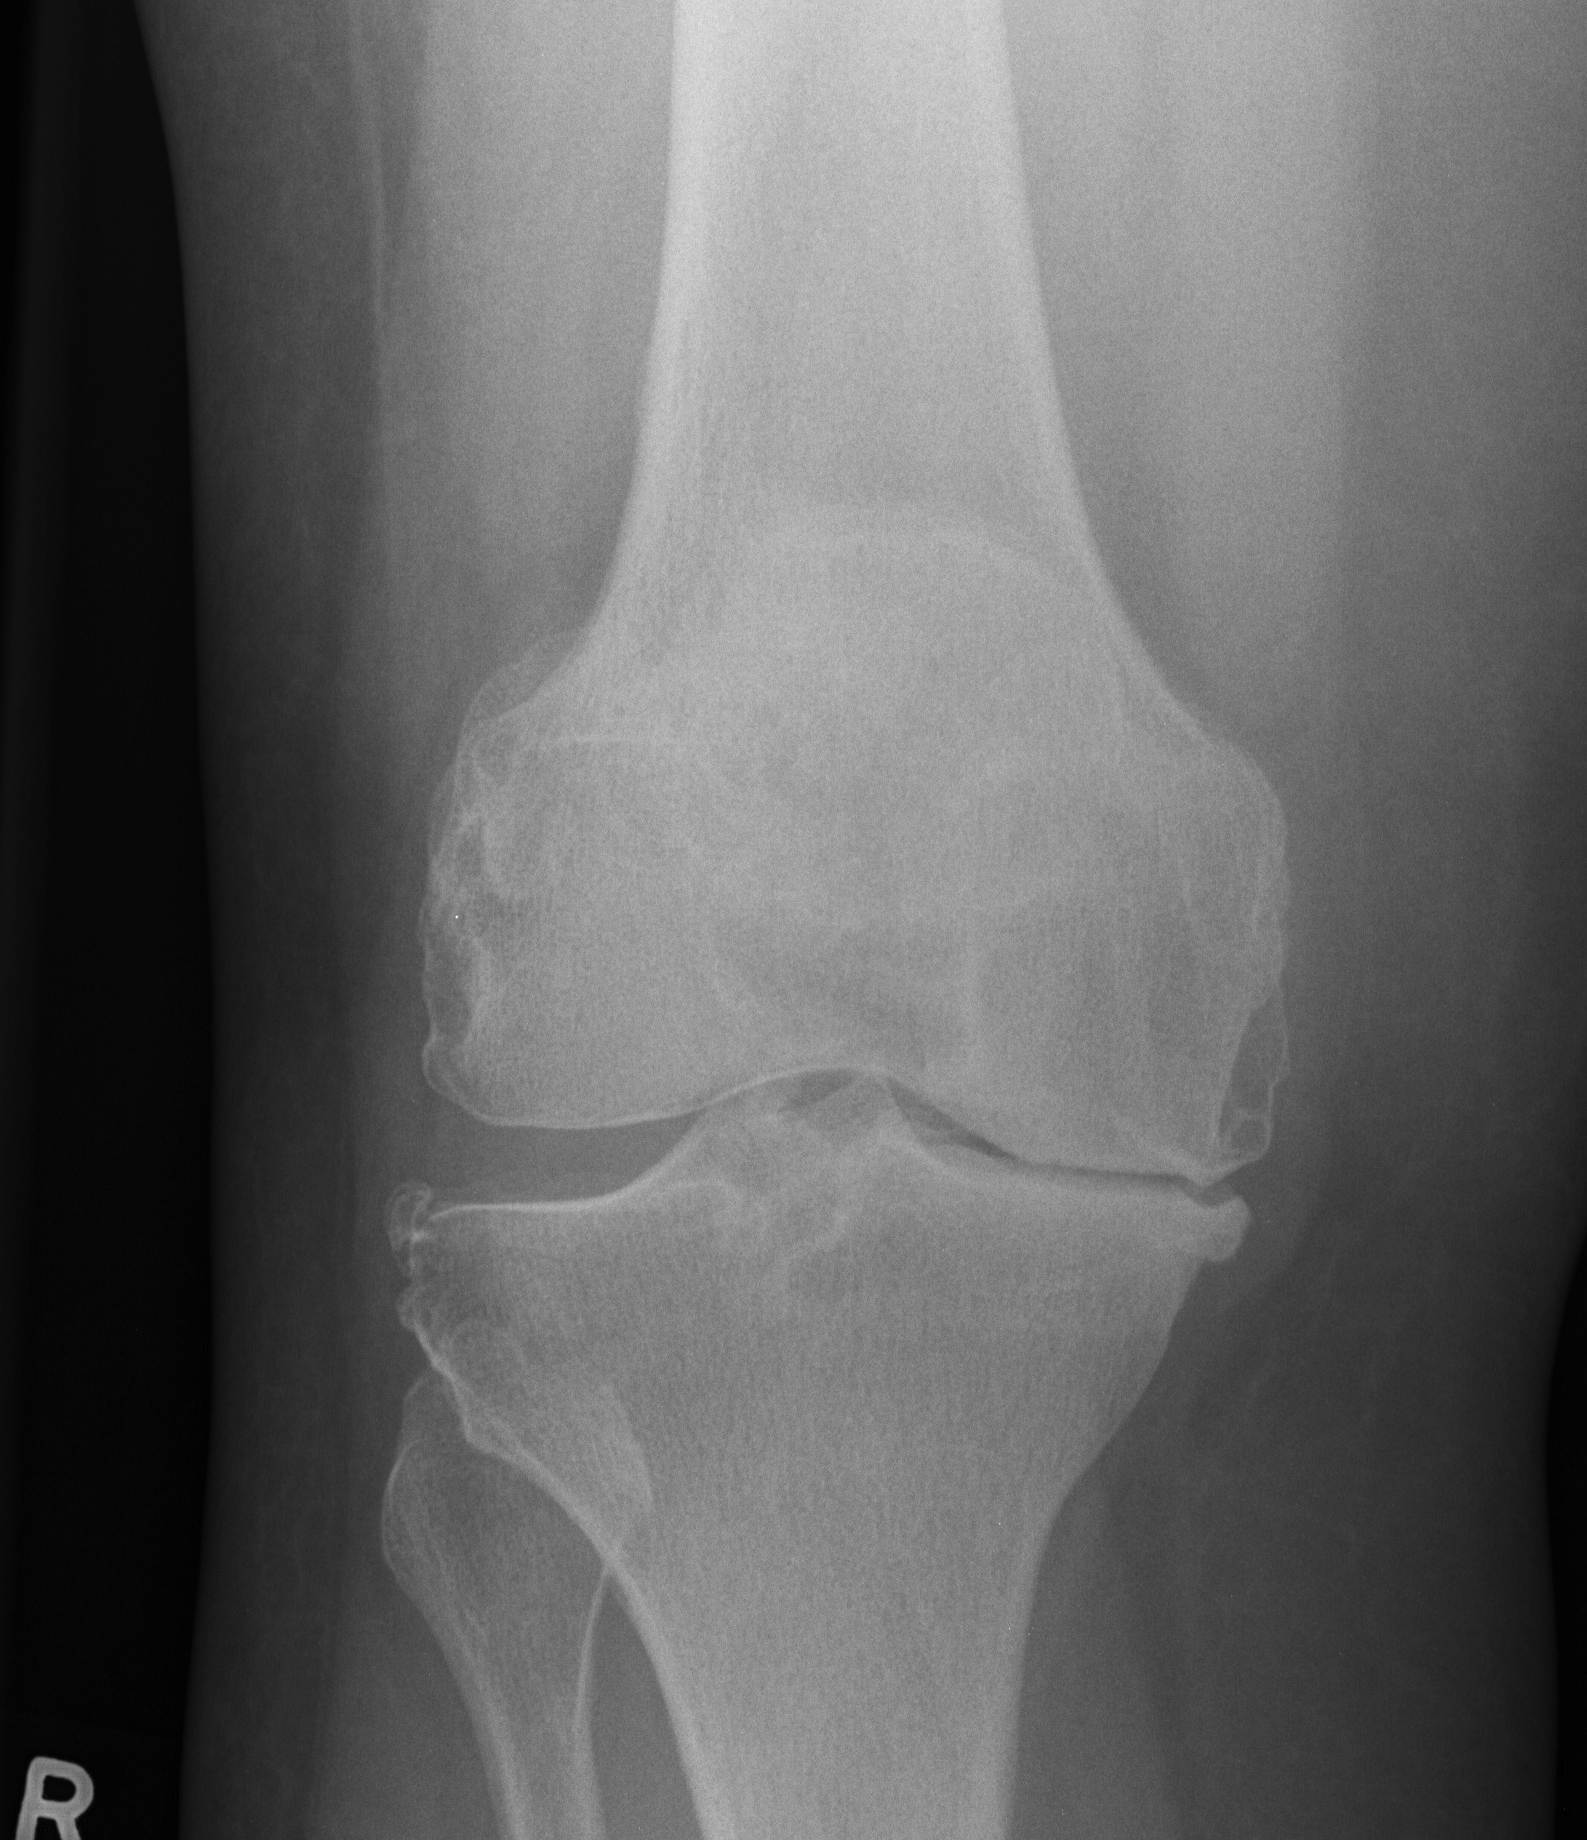
Pain relief combined with a balanced range of motion, strength & stability
Indications
Painful arthritic knee
- OA
- RA
Functional limitation
Ideal Patient
- > 65
- thin
- low functional demands
- no major medical illnesses
- not a candidate for HTO
- failed non operative management
Absolute Contraindications
Active sepsis
Inadequate soft tissue cover
PVD
°Extensor mechanism
Charcot
Relative Contra-indications
Previous osteomyelitis
Young patient
10% 7 year revision rate < 55 in AJR
Poor medical condition
Obesity
Winiarsky JBJS 98
- infection 10% vs 2%
- wound complications 20%
Samson et al ANZ J Surg 2010
- systemic review of TKR in obese (BMI > 30)
- significantly increased risk of wound complications and deep infections
- no weight loss post TKR
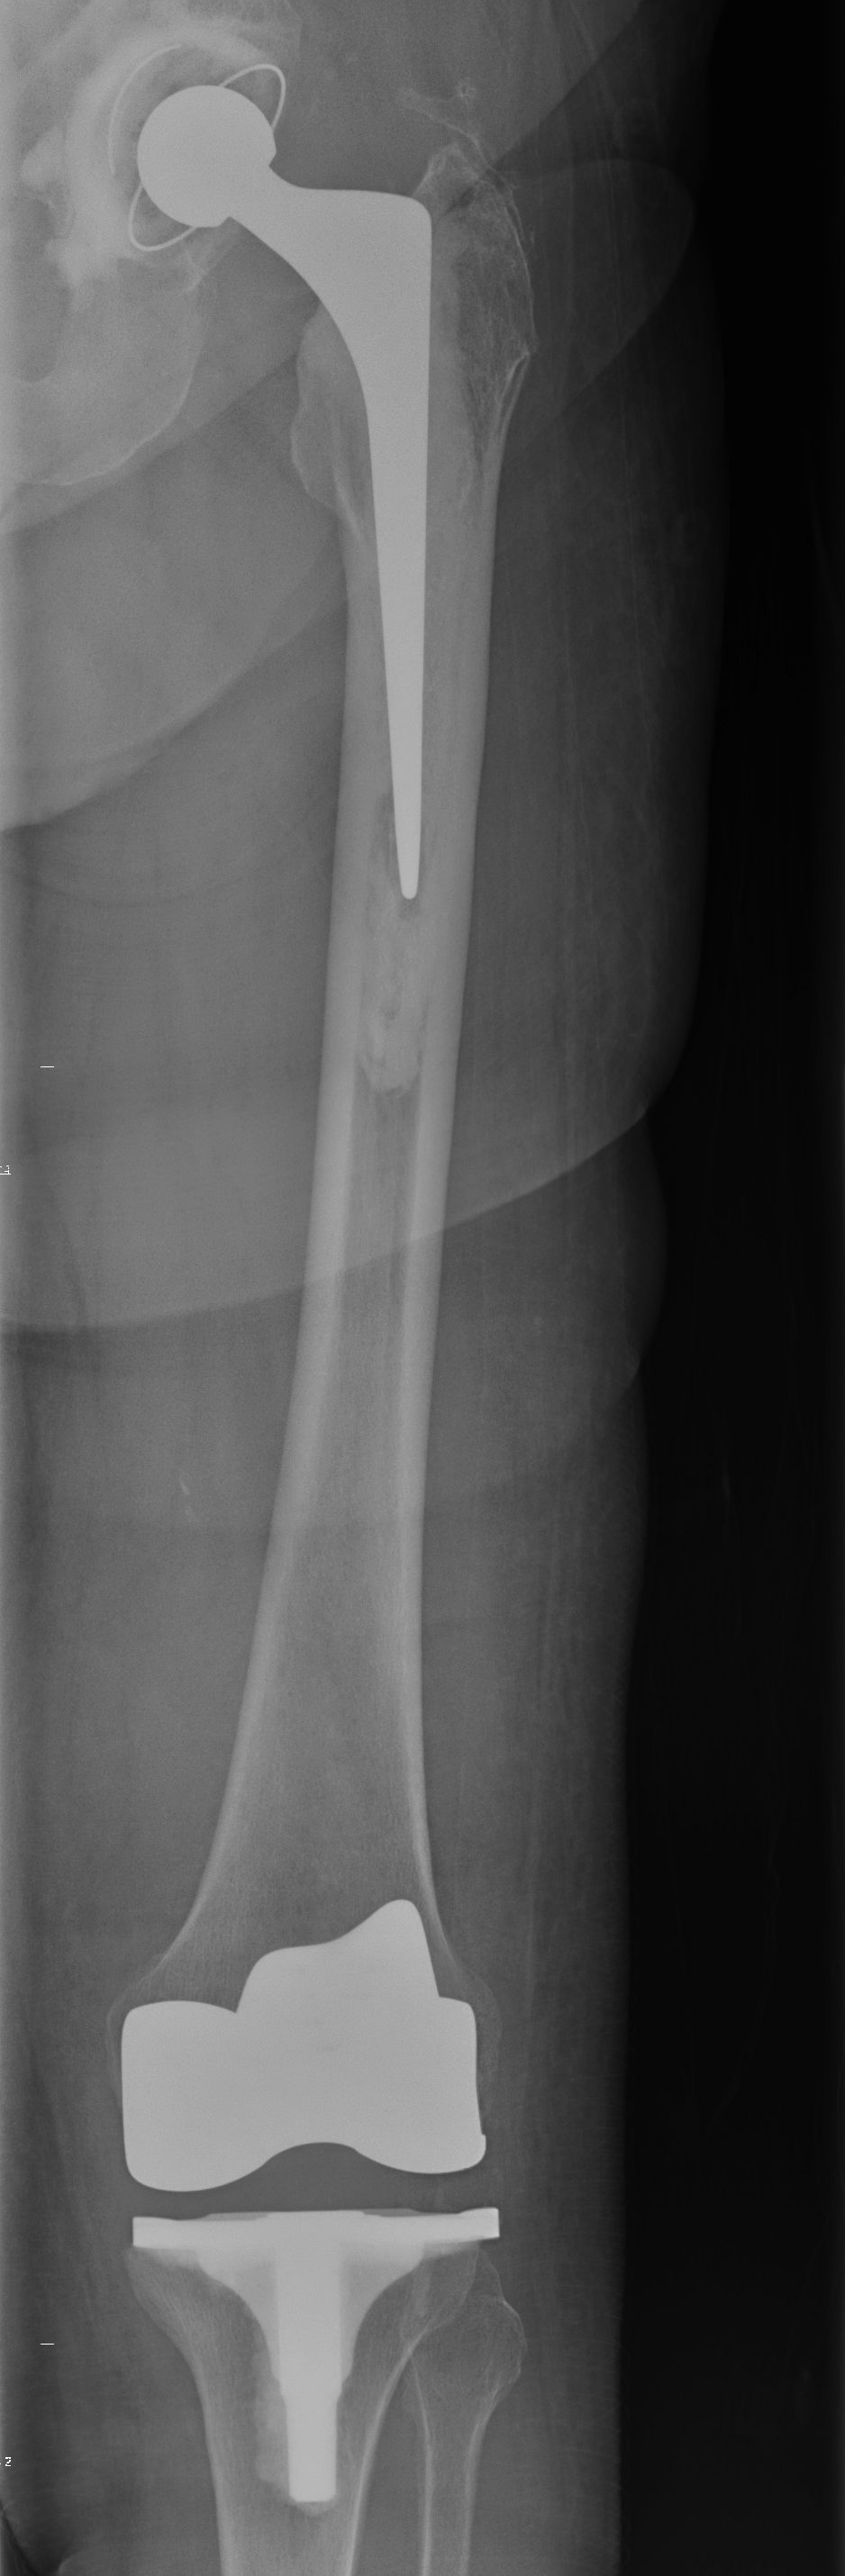
Bilateral TKR
Fabi et al J Arthroplasty 2010
- increased transfusion rate
- 2.1 x increased complication rate in bilateral group
- increased complication rate in patients > 70, obese and pre-existing respiratory condition
Patient Examination
1. Previous scars
2. Sagittal plane deformity
A. FFD
- increase distal femoral resection by 2 mm
B. Flexion range
- limited flexion range may make exposure difficult
- consider extensile exposure options
- will also decrease post operative flexion range
C. Recurvatum
- rare
- fill the extension gap
- will then often have limitation of flexion
- lengthen quadriceps
3. Coronal plane deformity
Varus / valgus deformity
- ? passively correctable to neutral
4. Stability
MCL pseudolaxity
- due to loss of medial joint space
- varus knee
LCL pseuolaxity
- due to lateral joint space loss
- valgus knee
5. Assess PFJ
6. Extensor mechanism
Ensure intact / no patellectomy
7. Hip
Stiff hip (OA, RA)
- may need to address hip first
- need good flexion for TKR
Fused hip
- need to do TKR over end of bed
- in order to hyperflex knee to access tibia
8. Foot deformity
Valgus foot puts valgus strain on TKR
- correct foot deformity
- or final tibio-femoral angle 2o varus rather than 7o valgus
9. Pulses
A. Non palpable, present on doppler
- proceed, no tourniquet
B. Diabetic, non palpable or non detectable on doppler
- vascular consult
Xray
Full length standing AP X-rays
- calculate valgus cut angle
- difference between MAF and AAF
- allows assessment of any femoral or tibial deformity
AP and lateral x-rays
- template femoral and tibial implant sizes
Lateral xray
- look for patella baja (may make exposure difficult)
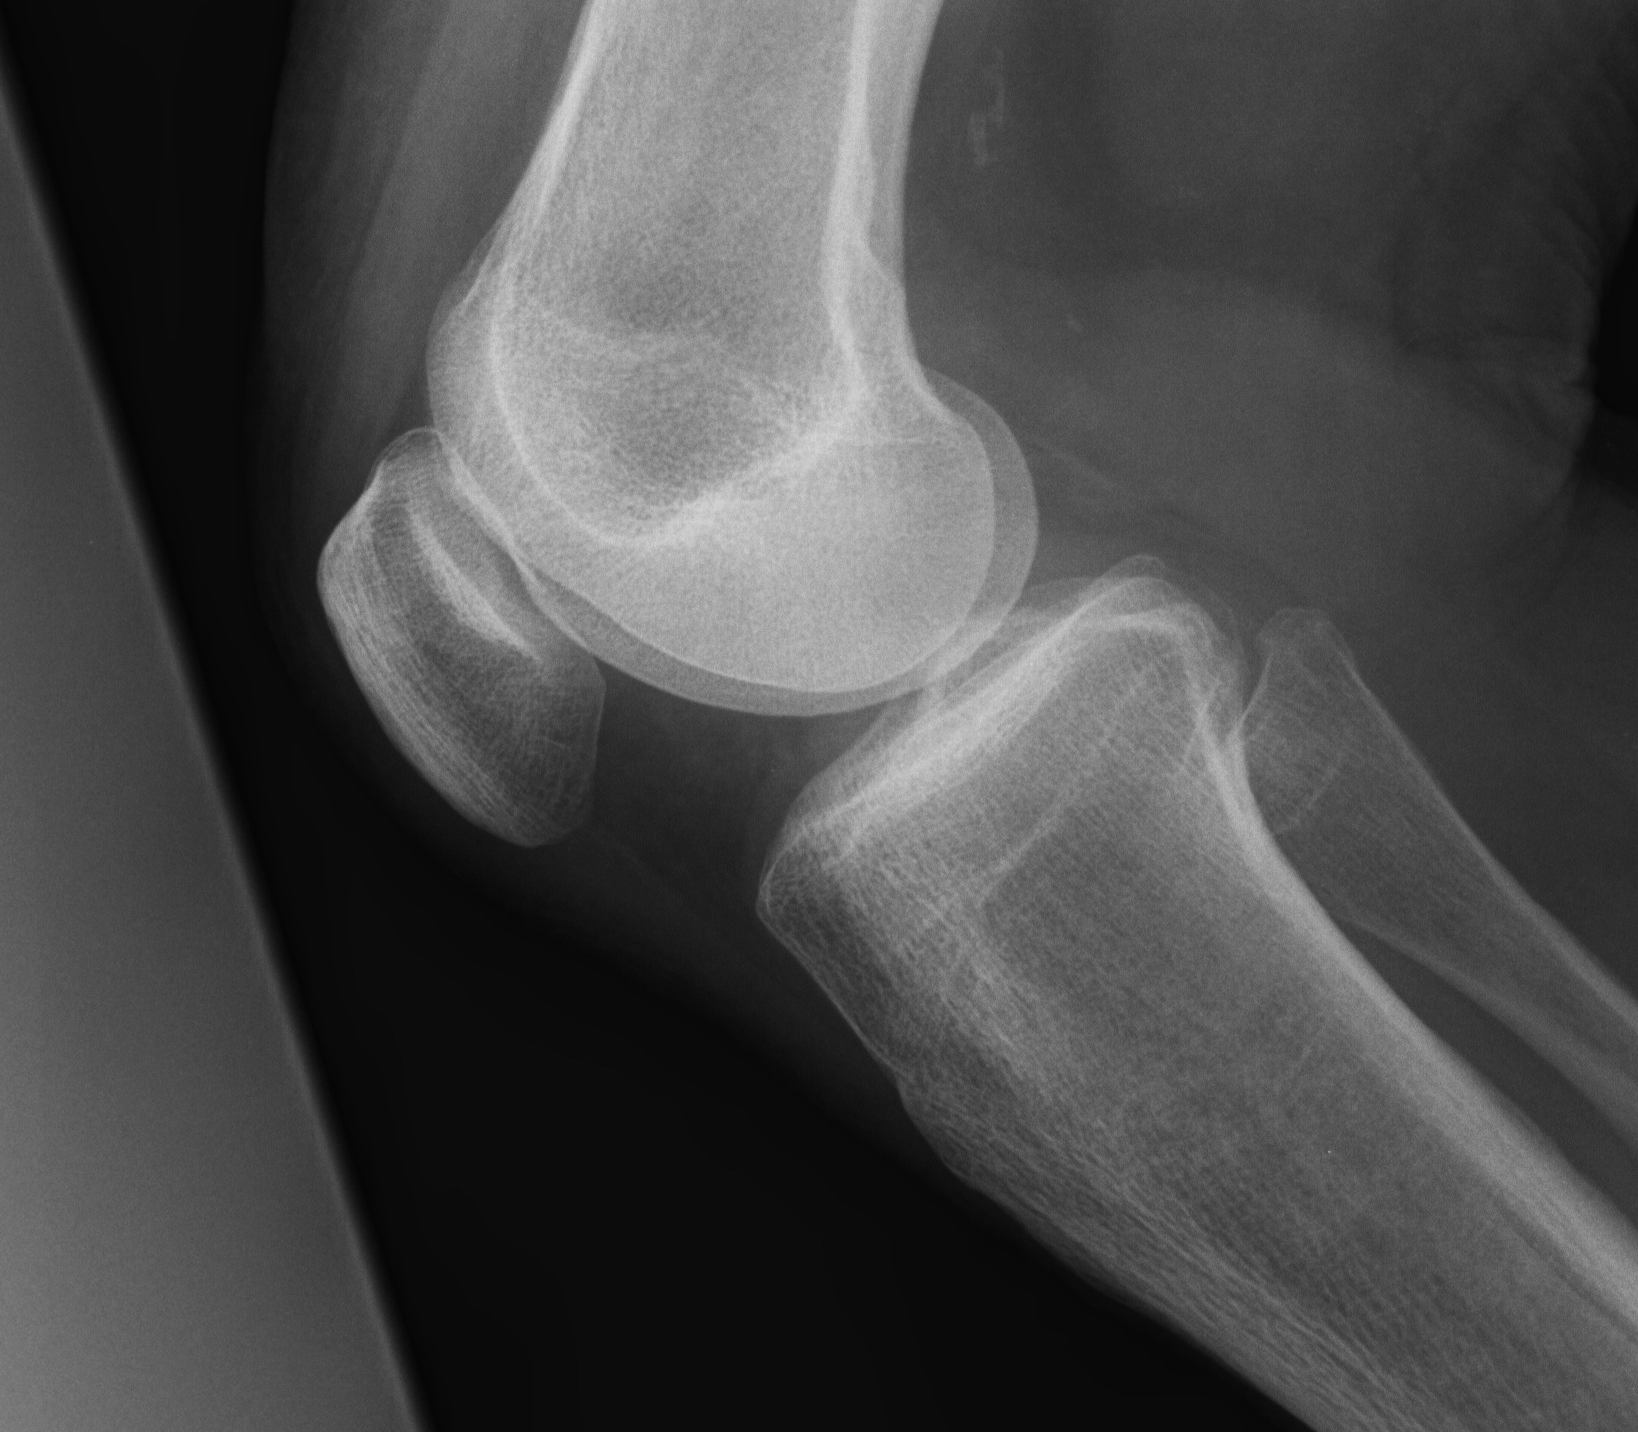
Evaluate deformity
- need for constraint
- need for augments
- need for stems


Pre-operative workup
Bloods / CXR / ECG if over 50
- medical and anaesthetic review
- swabs of groin, nose, axilla to exclude MRSA colonisation
- M/C/S of urine
- chlorhexidine showers on morning of OT
Equipment
Stems, augments and range of sizes
- correct side
- all cutting jigs available
Surgical Approach
Set up
Supine on table
- laminar flow
- space suits
- minimal traffic
- IV Abx, shave in OT
High tourniquet (if palpable pulses)
- padding underneath to distribute pressure
- wide cuff better (1.2x leg diameter)
- no prep under tourniquet
- exsanguinate first
- no evidence increases risk of DVT
Foot on bolster
- lateral support
- need to be able to hyperflex knee
Alcoholic chlorhexidine
Problematic previous incisions
1. Longitudinal
- use if possible
- leave wide bridge if impossible (>7cm)
- if choice, always use most lateral incision
- blood supply to skin flap comes from medial
2. Transverse
- intersect at 90°
3. If concerned, sham incision 2/52 prior
Approach
Midline anterior longitudinal skin incision
Above patella to tibial tuberosity
- don't go below TT
- avoid injury to infrapatellar branch of saphenous
Full thickness skin and subcutaneous flap
- above superficial retinaculum
- expose VMO, medial patella and patella tendon
Options
1. Medial parapatellar approach
Along medial border of patella tendon, patella
- leave fascial flap along VMO for repair
- leave flap along side patella
- don't go into muscle
2. Mid-vastus
Flex knee to place VMO under tension
- divide in midsubstance
Nestor et al J Arthroplasty 2010
- RCT of midvastus v medial parapatella
- mild increase strength at 3 weeks
- no other benefit
3. Subvastus
Preserves extensor mechanism
- elevate VMO off medial intermuscular septum
Jung et al Int Orthopedics 2009
- subvastus v medial parapatella
- earlier SLR and better flexion at 10 days with subvastus
4. Lateral approach
- valgus knee > 20°
Evert patella
Flip laterally
- homan / ring handled spike retractor inside to hold
Can just create a lateral pocket in fat and slide patella
Extensile Approaches if cannot Evert Patella
1. Quadriceps "Snip"
Extend medial parapatellar arthrotomy laterally
- distally to proximal across rectus
- obliquely in superolateral direction
No real post operative changes in rehab
- little loss of extensor power
2. Patella turndown (Insall)
Inverted V
- second incision 45o to medial incision
- dissection distally via tendon of VL & lateral retinaculum
- stop short of and preserve SLGA
- can convert to VY plasty
Repair with nonabsorbable suture
Problems
- patella necrosis
- weakens extensor mechanism
Post op
- protect from flexion 2/52
3. Tibial Tuberosity Osteotomy
Incision extended distally to expose proximal 10 cm tibia
- raise medial periosteal - osseous flap
- saw / osteotomes
- about 8 x 2 cm
- 1 cm thick
- leave attached laterally and hinge open
- reattached with wires or screws

Post op
- limit active extension
- limit passive flexion
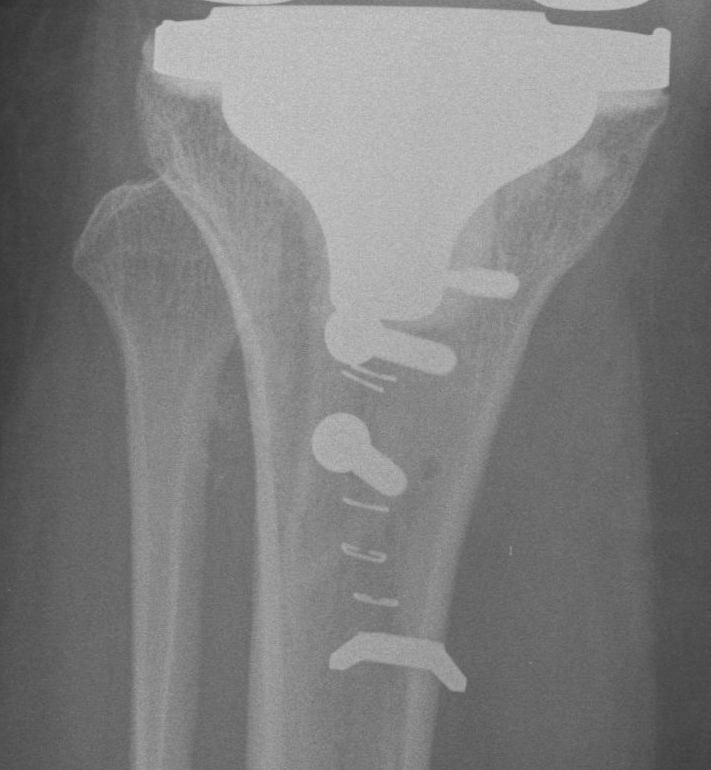
In revision
- use wires that pass about stem
- 3 x wires
- 3 x drill holes in lateral aspect of bone hinge
- pass about stem
- 3 x drill holes in medial tibia
Soft Tissue Release
Removal ACL +/- PCL
Osteophytes debrided
Removal of meniscus
Removal of fat pad if further exposure required
Medial release
- knee in extension
- medial tibial periosteum is elevated
- a narrow Hohmann retractor positioned subperiosteally around the medial border of the medial condyle
- residual periosteum is dissected posteromedially to the level of the insertion of the semimembranosus
- with increasing levels of varus will continue posterior and release SM
Bone Resection
Options
Advantage femur first
- makes the tibia easier to access
Advantage tibia first
- can mark on femur appropriate rotation of AP resection in flexion
- can use tensioner / flexion extension gap resection method
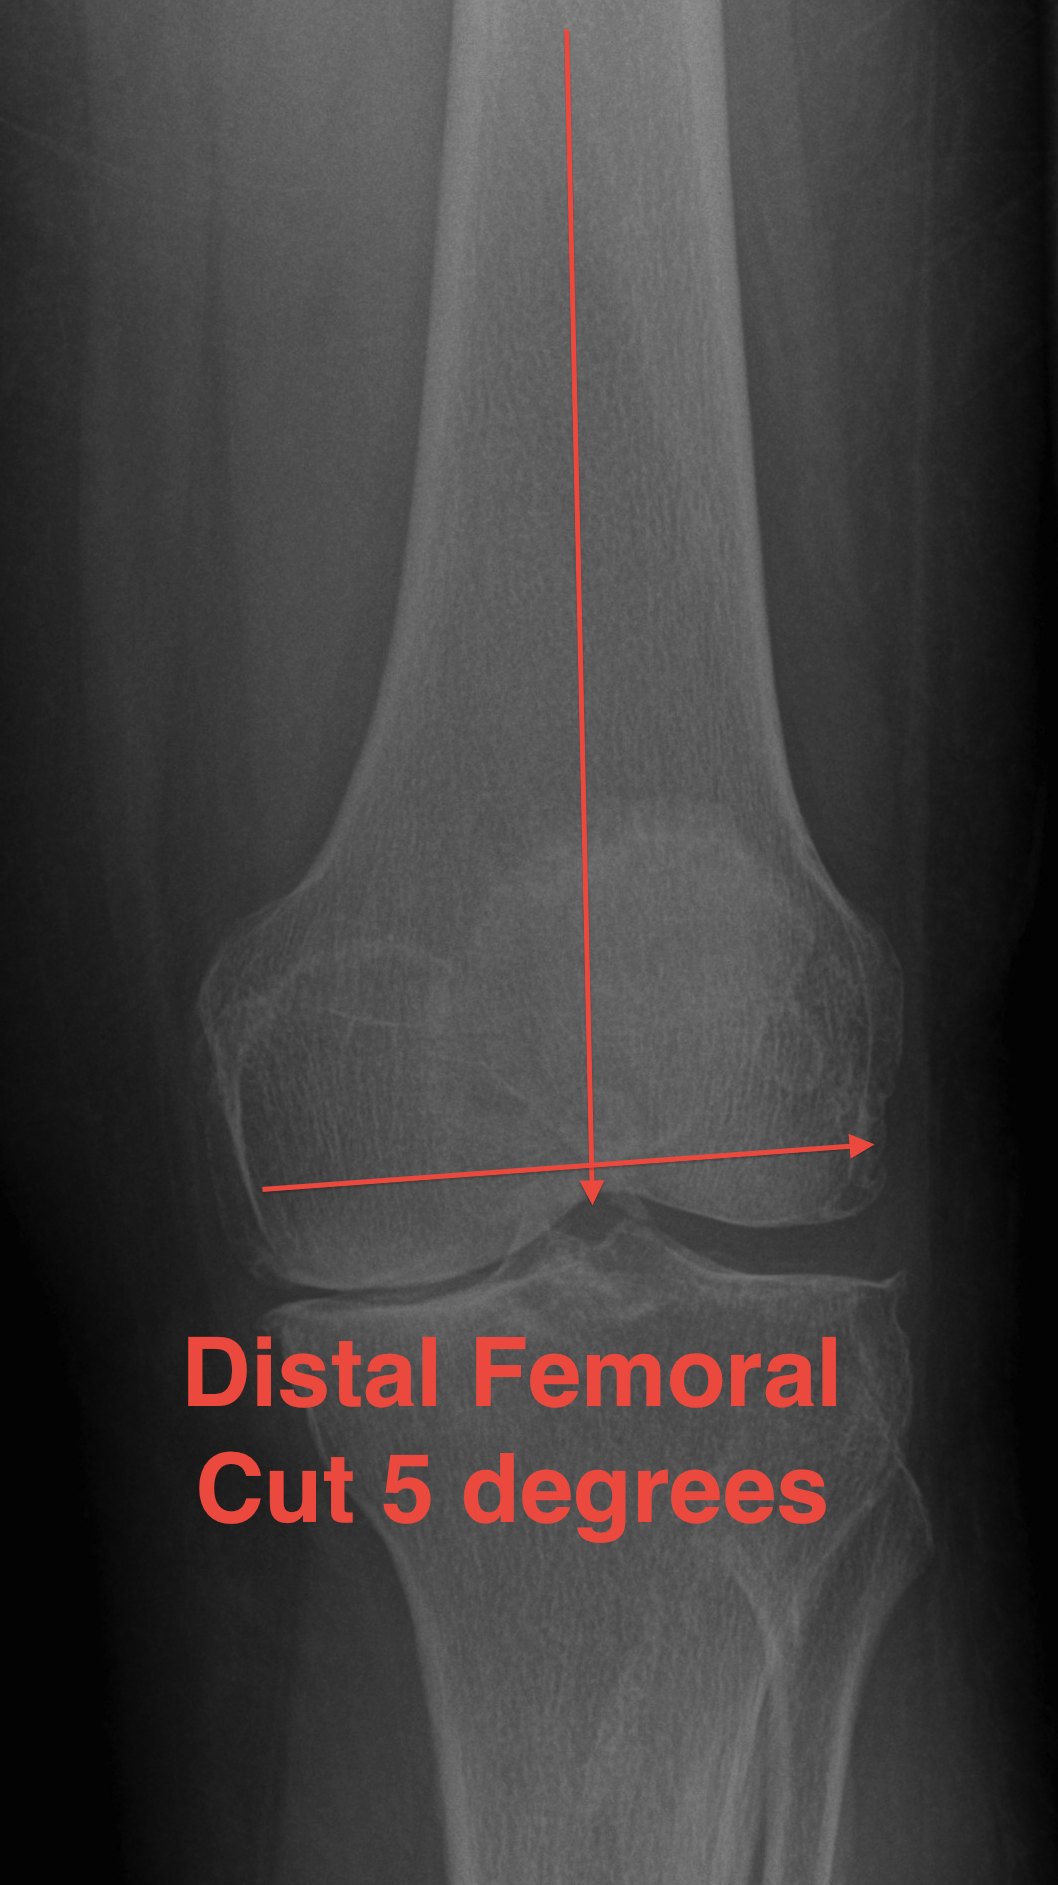
Distal Femoral Resection
Theory
- the tibia is cut at 0o
- want residual tibiofemoral axis to be 3-7o
- therefore, instead of cutting femur at 7-9o valgus, cut at 5-7o
- matched malalignment
Lateral plane
- at right angles to anatomic axis
Alignment
A. Intra-medullary best
B. Extramedullary less accurate
C. Significant deformity of femur / THR
- may need to use EM / short IM / computer navigation
Entry point
Clear osteophytes from intercondylar notch
Point
- 7 - 10 mm anterior to ACL
- slightly medial
- palpate femoral shaft
- pass IM drill reamer
- enlarge the hole to vent fatty contents
A. If entry too posterior
- will flex the femoral component and limit extension
B. If entry too lateral
- distal cut will be made in excessive valgus
Place IM rod & distal femoral cutting Jig
Distal resection
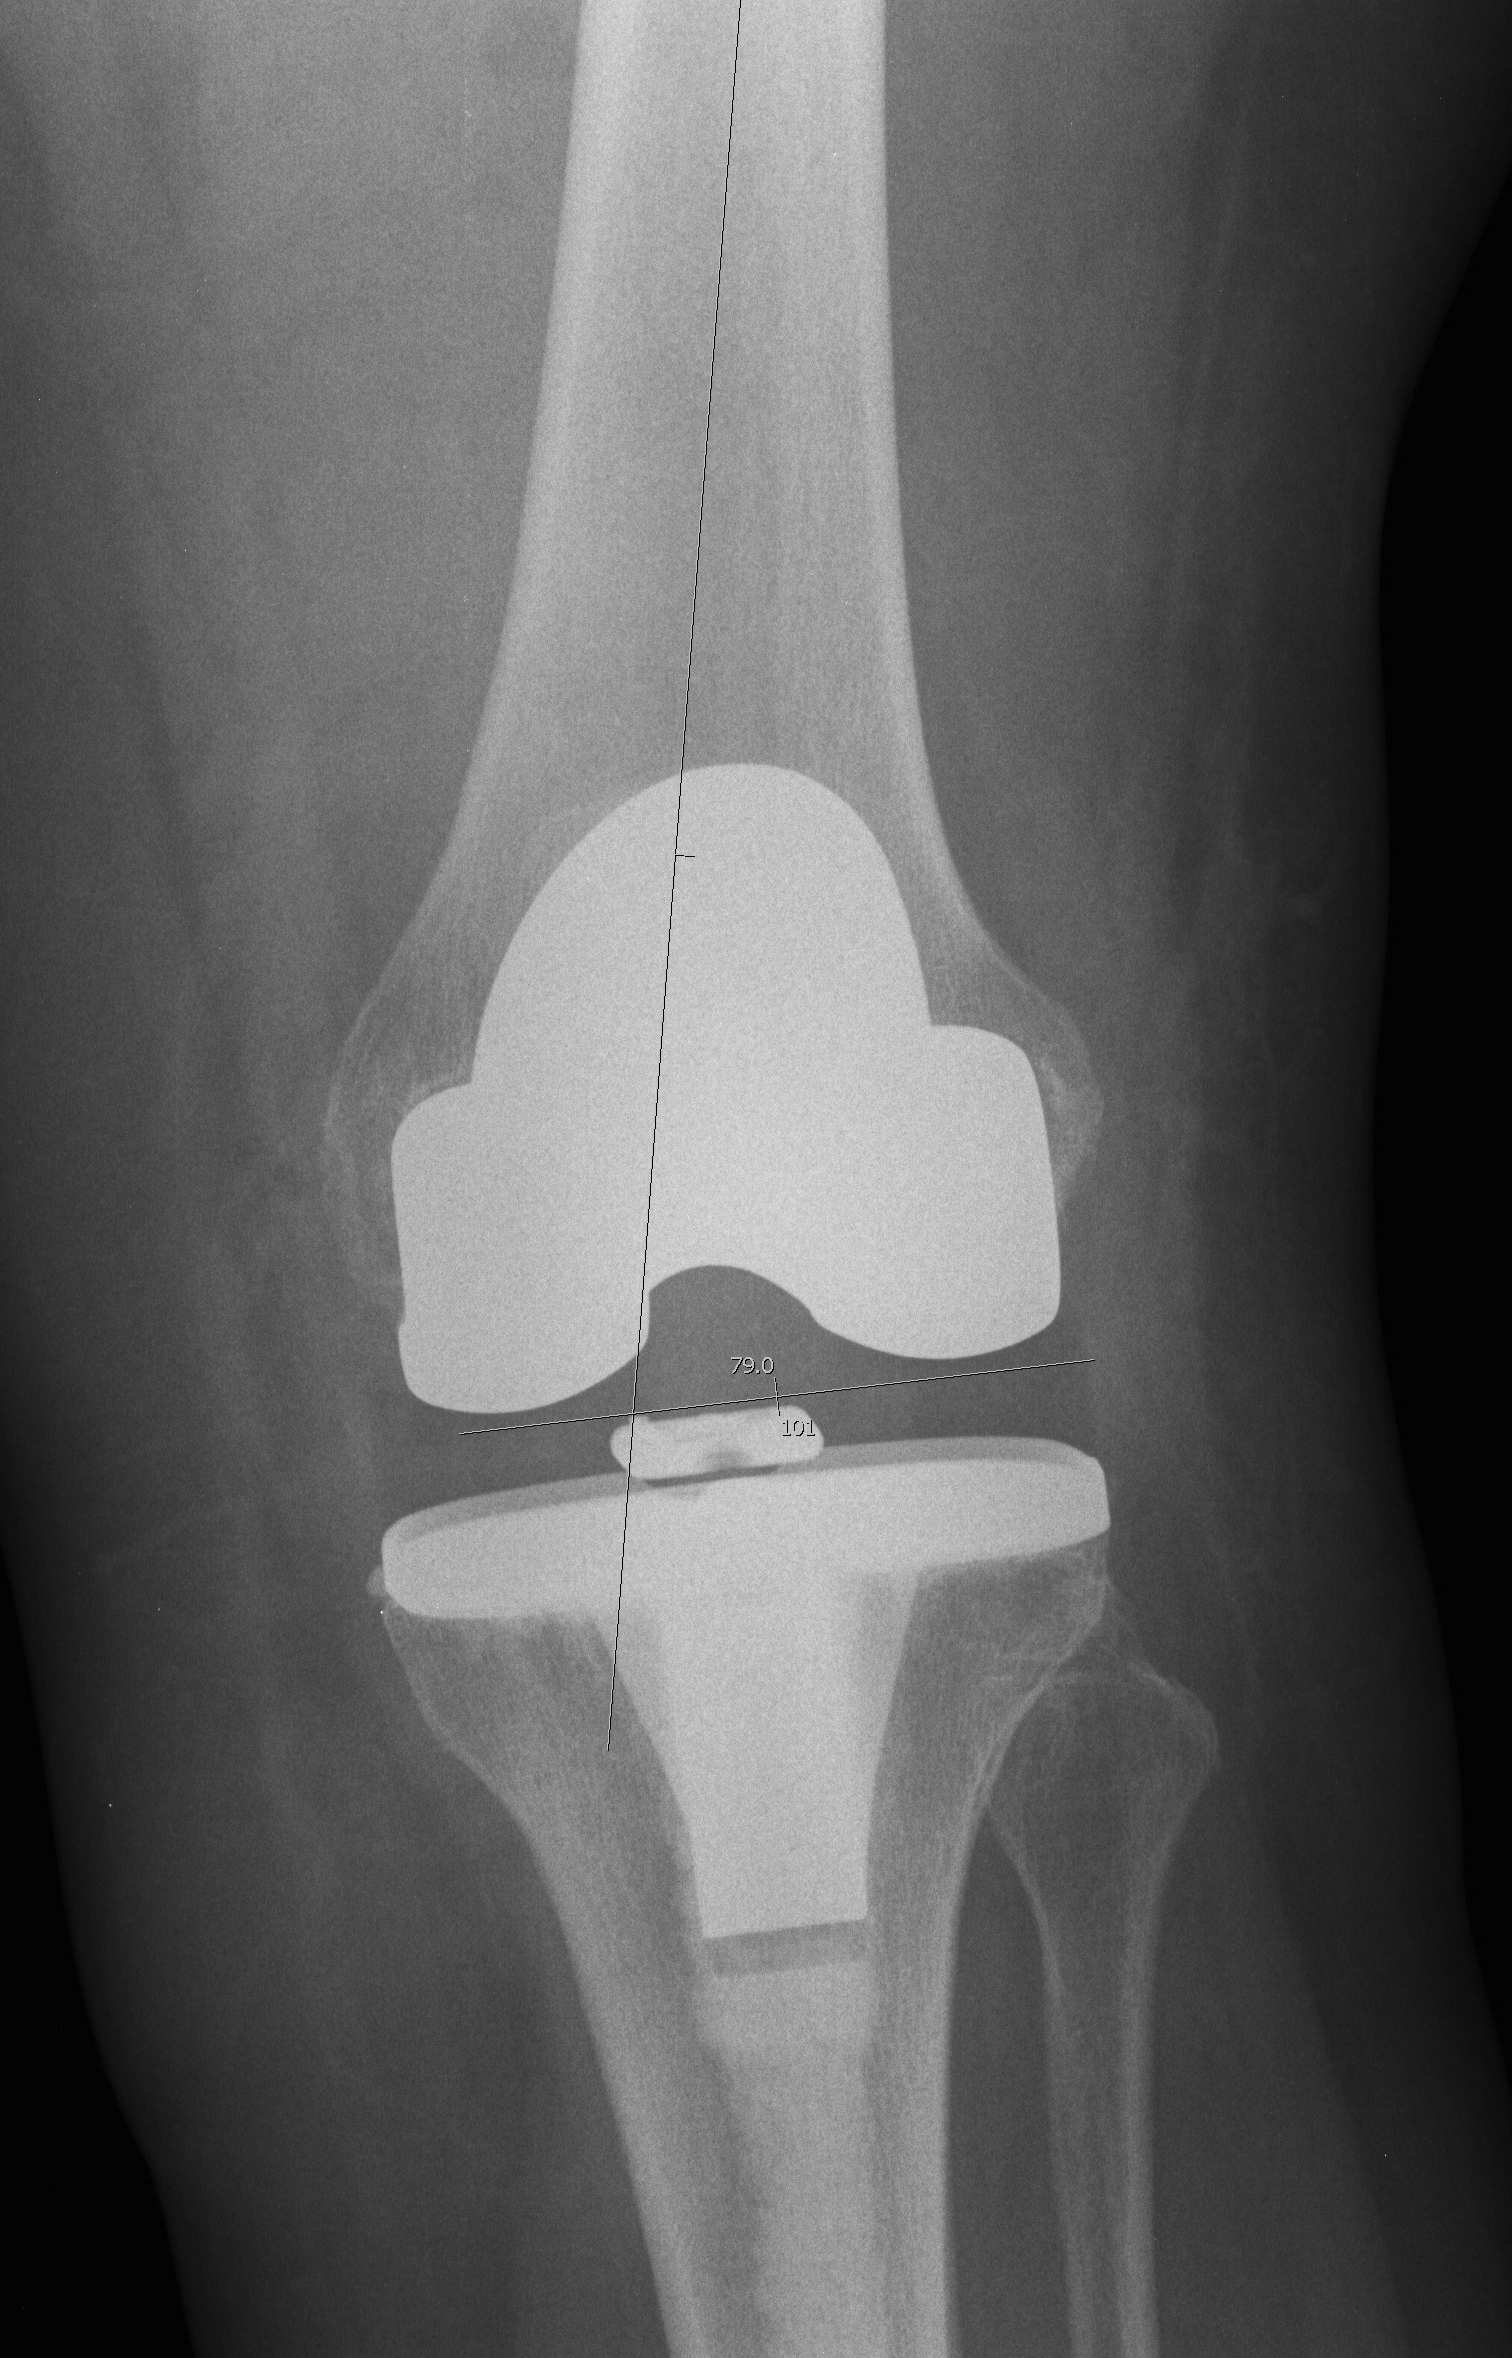
Valgus angle
- pre-op valgus cut angle
- 0o to mechanical axis
- 5 - 7o from anatomical axis
- usually 5o tall and thin, 7o short and fat
Resection depth
- cut 8mm for resurfacing (thickness of femoral component) from most distal surface
- increase if FFD (10 mm)
- sets joint line
- the 8 - 10 mm will always be from the lateral side
- the thickness of the medial resection is > thickness of lateral resection
Joint line
Position
- 3 cm below medial femoral epicondyle
- 15 mm above fibular head
- at meniscofemoral ligament / mensical remnant
A. Elevation of joint line
- excess distal femoral resection for FFD
Effect
- may need to use PS instead of CR to maintain flexion balance
- generates patella baja
- extension gap larger than femoral gap
B. Lowering of joint line
- excessive tibial resection
AP Resection
A. Anterior referencing
- measure from anterior down
- if between sizes down size
Advantage
- avoid notching
- avoid overstuffing PFJ
Disadvantage
- loose flexion gap from downsizing
B. Posterior referencing
- posterior condyles up
- if between sizes upsize to avoid notching
Advantage
- stable flexion gaps
Disadvantage
- overstuff PFJ
- be aware of insufficient posterior condyles / IR
Size Femur with sizing guide
Clear synovium anteriorly
- seat feet of sizer on posterior condyles
- use stylus anteriorly
Note
- anterior or posterior referencing is built into jig
- both have feet to place on posterior femoral condyles
Between sizes
- up size
- move jig anteriorly appropriate amount
- avoids notching
- resects more posterior femoral condyles
Set Rotation of AP cutting block
Externally rotate femur
- normal patella tracking
- equal flexion extension gap
- should cut more off anterior aspect of lateral condyle than medial condyle
1. Posterior Condylar Axis
- need to ensure no posterior deficiency or posterior condylar asymmetry
- cutting block must be set 3o ER to this line
2. Epicondylar Axis
- lateral epicondylar prominence and medial sulcus of the medial epicondyle
- set cutting block parallel to the epicondylar axis
3. Whiteside's line
- Whiteside's line midline of trochlea
- most reliable
- should be 90o to epicondylar axis
Once size and rotation is set, drill holes for the cutting guide
- recheck the drill holes are on the appropriate axis
- ensure appropriate rotation
Anteriorly
- resect more lateral condyle than medial
Posteriorly
- resect more medial condyle than lateral
AP and chamfer cuts
Apply block
- ensure no anterior notching (femoral cortex proximal to trochlea)
- use angel wings to do so
- make anterior resection
- before posterior resection must protect LCL and MCL
- insert Homan retractors under collateral ligaments
PCL block resection
Separate Cutting Block
Medial / Lateral positioning important
- cover femur with component
- minimise overhang
- prefer to tend laterally for patella tracking
Resect box for femoral cam
Tibial Bone Cut
Alignment
Intramedullary guide
- less accurate with any tibial deformity
Extra-medullary guide
- most accurate
Extramedullary Alignment
Maximally flex knee
- retractors each side
- forked tongue, blunt homans retractor behind tibia to sublux forward
Centre jig at knee
- pin centre of interspinous eminence
- junction middle / medial two thirds tibial tubercle
- impact first pin on jig
Set rotation at knee
- rotate to tibial crest
- impact second proximal pin on jig
Tibial component rotation
A. Internal rotation of component
- will give valgus due to posterior slope
- results in tibial ER & increased Q angle
B. Cut tibia when ER
- posterior slope creates varus
C. Cut tibia when IR
- posterior slope creates valgus
Centre jig over talus
- line up with second MT
- halfway between medial malleolus and anterior fibula
- between EHL / EDL
- always tend to go towards medial malleolus to avoid varus which is most common mistake
- should align over tibial crest
Posterior slope
Normal posterior slope is 10o
- decreased by menisci to 3o
If tibia is cut at 90o, increased risk of tibial subsidence
- if flat poly design, cut at 10o
- if oblique poly design, can cut at less
Bone anteriorly is poor
- therefore usually wish to cut with a posterior slope to preserve anterior bone
- degree of posterior slope also built into poly
Check posterior slope
- usually built into cutting block
- ensure matches current slope
- use angle wings
Excessive posterior slope
- resects PCL origin
- loose in flex
- excessive metaphyseal resection
Anterior slope
- limited flexion
- decreased flexion gap
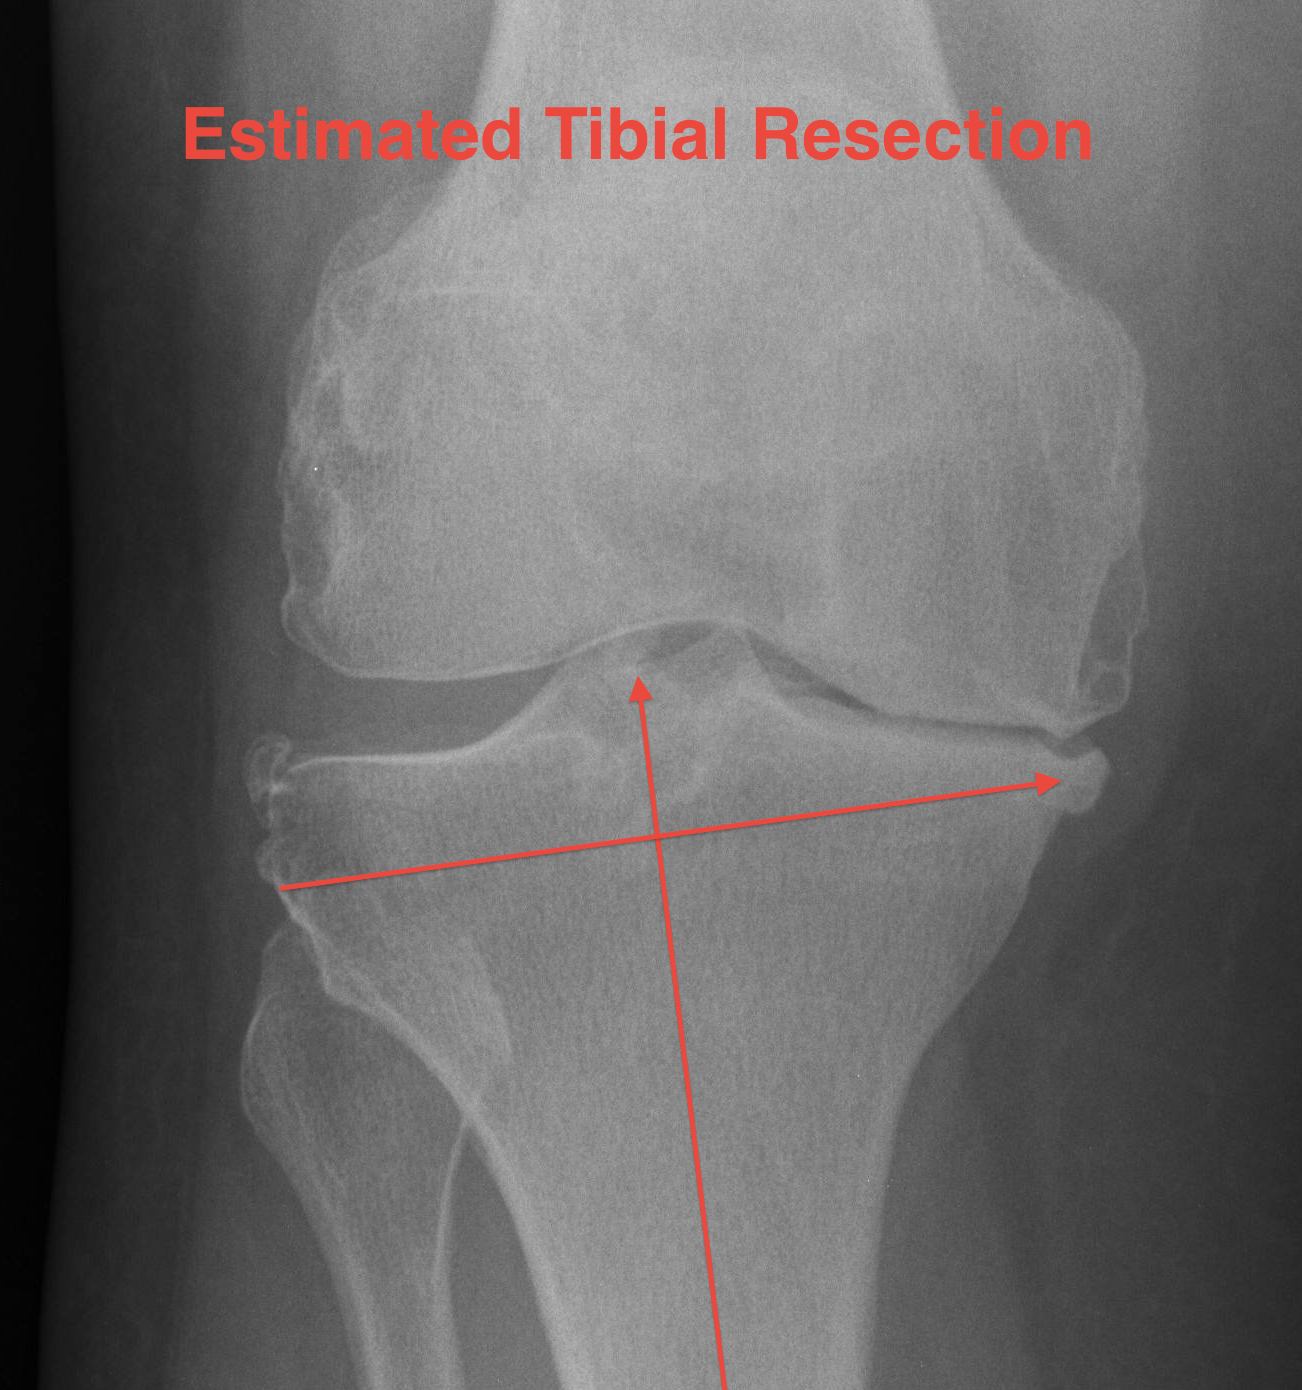
Set resection depth
Options
- resect 2 mm from worn side (medial)
- resect 10 mm from normal side (lateral)
- use stylus
Best to cut from lateral side
- have set joint line distally on femur from lateral side
- best to continue to do so from lateral side
- in a varus knee the medial joint line is worn
- lateral joint line is usually preserved
- enables preservation of anatomic joint line
Pin block in place
Pin in place 2 pins
- drill first
- prevents pins being divergent
- allows adjustment of block
Double check tibial cut
Drop rod
- double check alignment
- ensure over centre of talus
- can adjust
- insert 3rd oblique pin
Recheck resection level with angel wings
- take more off lateral than medial
- ensure lateral side not more than 1 cm
Over-resection
1. Lowers joint line
2. Poorer strength cancellous bone
3. Decreased surface area
4. Removes PCL / requires PS
Severe varus deformity
Problem
- 10 mm from lateral side does not take medial bone
- do not cut to level of medial defect as cancellous bone of the tibia becomes weak
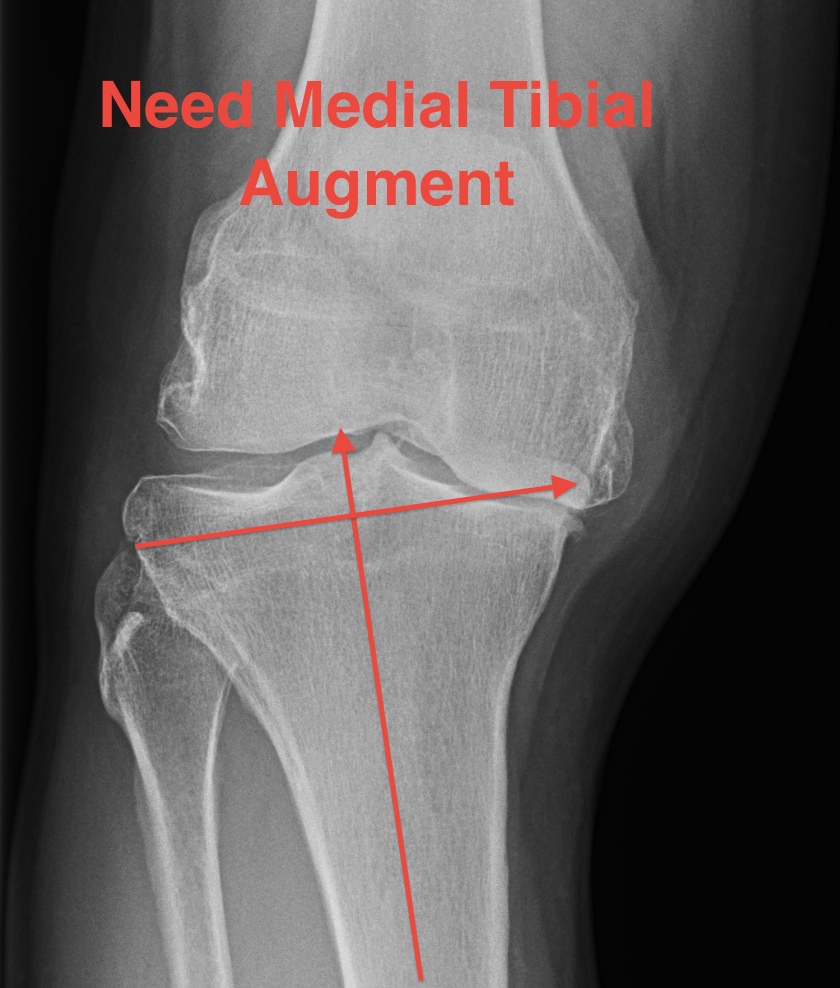
Solution
- stay subchondral on lateral side
- never more than 10 mm cut lateral side
- build up medial side
Options
1. Cement
2. Autologous bone graft
- may have enough in primary
- from posterior or distal femoral condyles
- supplement with 2 screws
3. Augments
- 5 - 10 mm
- use stems if use augments
- offsets forces to the diaphysis (up to 30%)
Cut tibia
1. Protect MCL / LCL with retractors
2. Protect NV structures
- anteriorly sublux tibia
- forked tongue / broad homan protecting posteriorly
3. Protect patella ligament
- can cut lateral side with saw
4. Protect PCL if CR
Clear posterior femoral osteophytes
Lift up femur / insert IM rod / push tibia posteriorly
- feel with finger
- curved osteotomes
Soft Tissue Balancing
Trial
Place trial tibia and femur
- trial poly (minimum 8 mm)
Coronal plane balancing
Tight in extension medially
- ensure all osteophytes released
- release semimembranosus
- release posterior half MCL
- release medial posterior capsule with curved osteotomes
- release pes
Tight in flexion medially
- release PCL
- release anterior MCL
Sagittal Plane Balancing
- trial flexion and extension gaps
- 6 possible problems (see TKR / Balancing)
Set rotation of tibia / prepare tibia
- ensure full medio-lateral coverage
- no medial overhang to avoid impingement
- can have some slight lateral overhang
- tend to have to compromise in the AP plane
- should usually align with medial third of tibial tuberosity
- cut keel for tibia after ensuring correct rotation
Patellofemoral joint
1. Not resurfacing
- remove osteophytes
- denervate
2. Resurfacing
Onlay technique
- caliper measure thickness of patella
- aim to reproduce this with button
- size patella button
- each button size has an appropriate resection
- aim to leave minimum 15mm bone
- apply cutting jig
- ensure flat medial to lateral cut
- place button jig / medialise button / drill peg holes
Inlay technique
- caliper measure thickness patella
- size patella
- patella will have specific depth to drill
- ensure leaves adequate patella thickness above peg holes
Fixation and Closure
Prepare
Wash all surfaces
- H202
- dry with sponges
- good exposure of tibia
All components opened / checked / ready
Cementing
Antibiotic impregnated low viscosity cement (Palacos)
- 1 - 2 mixes
Tibial metal tray first
- pressurise into tibia
- insert tray, ensure correct rotation
- compress, even cement mantle
- clear all cement
Insert poly
- definitive / trial
Femoral component
- place cement on exposed surfaces, compress
- small amounts cements posterior femoral condyle area of femoral component
- impact, ensure not flexed
- remove excess cement
Extend leg / wait for cement to set
Insert definitive poly if used trial originally
- can retrial
- this step is difficult if using PS poly
Patella tracking
Check
- one thumb technique
- flex and extend knee
Lateral retinacular release
- internal surface
- longitudinally
- protect SGA superiorly
- distally to lateral margin patella tendon
- proximally to just above superior patella
- not into vastus lateralis
Closure
Tourniquet release
Hersekii et al Int Orthop 2004
- RCT of tourniquet release to obtain hemostasis v tourniquet release after dressings
- increased blood loss with early release
- no difference in post op Hb, transfusion, operation or tourniquet times
Drain
Parker et al JBJS Am 2004
- meta-analysis
- using a drain increases transfusion requirement
- no difference in wound complications or infection
- more likely to need to augment dressings without drain
Closure
Water tight to prevent haematoma drainage
- 4-5 1 vicryl figure 8 sutures
- 1 vicryl locking suture
Post operatively
IV ABx x 4
Anticoagulation
Low dose LMWH that night or next day for 4 weeks
TEDS / SCD's
Early mobilisation
Analgesia
1. Intra-articular analgesia
- combinations LA / NSAIDS
2. Epidural
3. Femoral nerve blocks / sciatic nerve blocks
4. PCA
5. NSAIDS
6. Long acting oxycontin early
- aids wean off PCA
Physiotherapy
Immediate weight bearing and ROM
- quadriceps exercises
- can use splint until SLR
- need adequate analgesia
CPM
Advantage
- improves clearance of blood from joint
- reduces need for analgesia
- increases early ROM
Disadvantage
- no evidence improves outcome
- interferes with wound healing