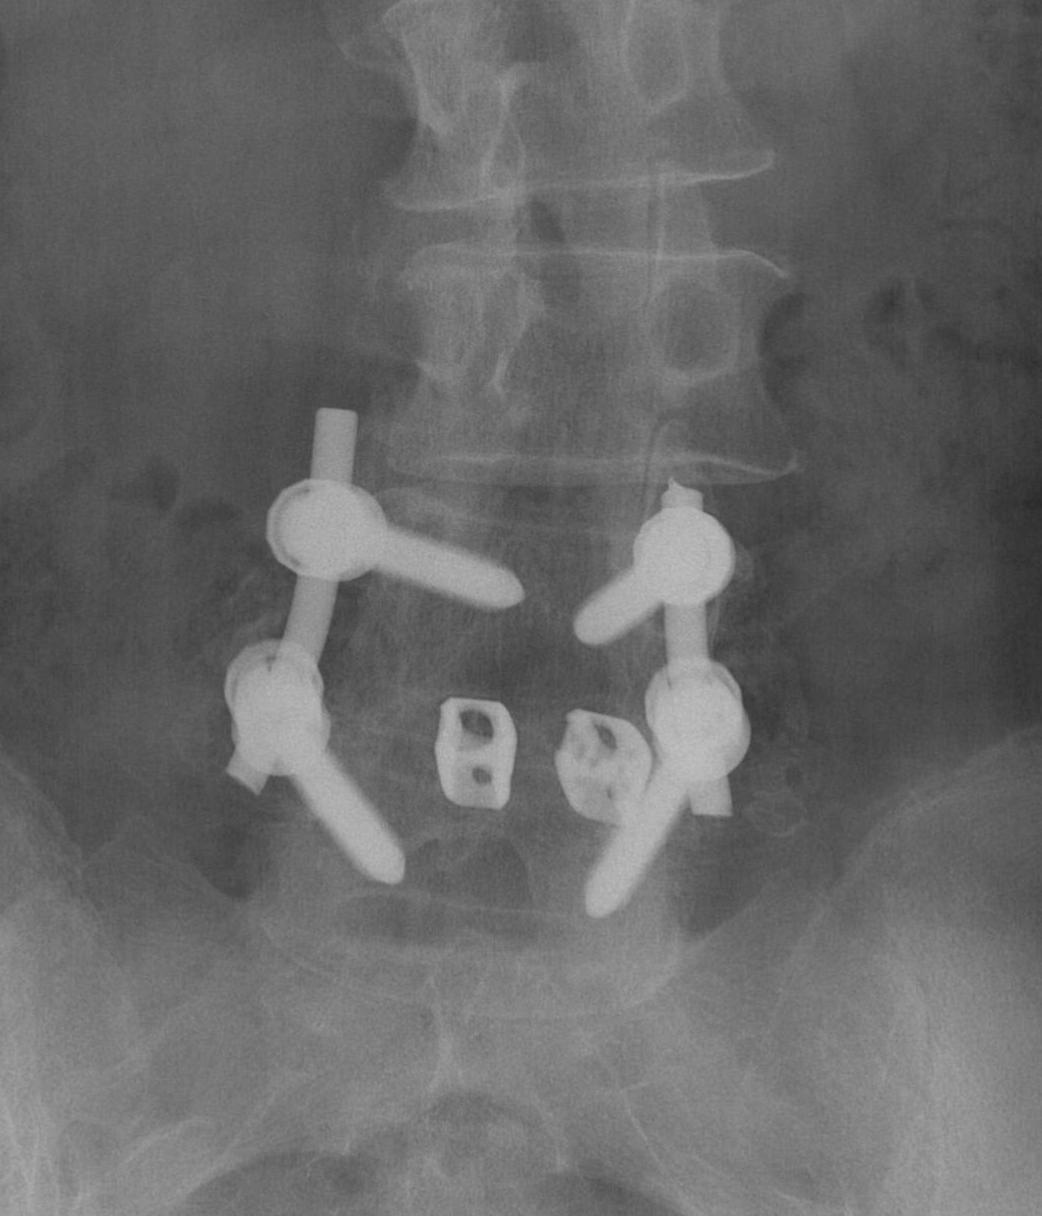
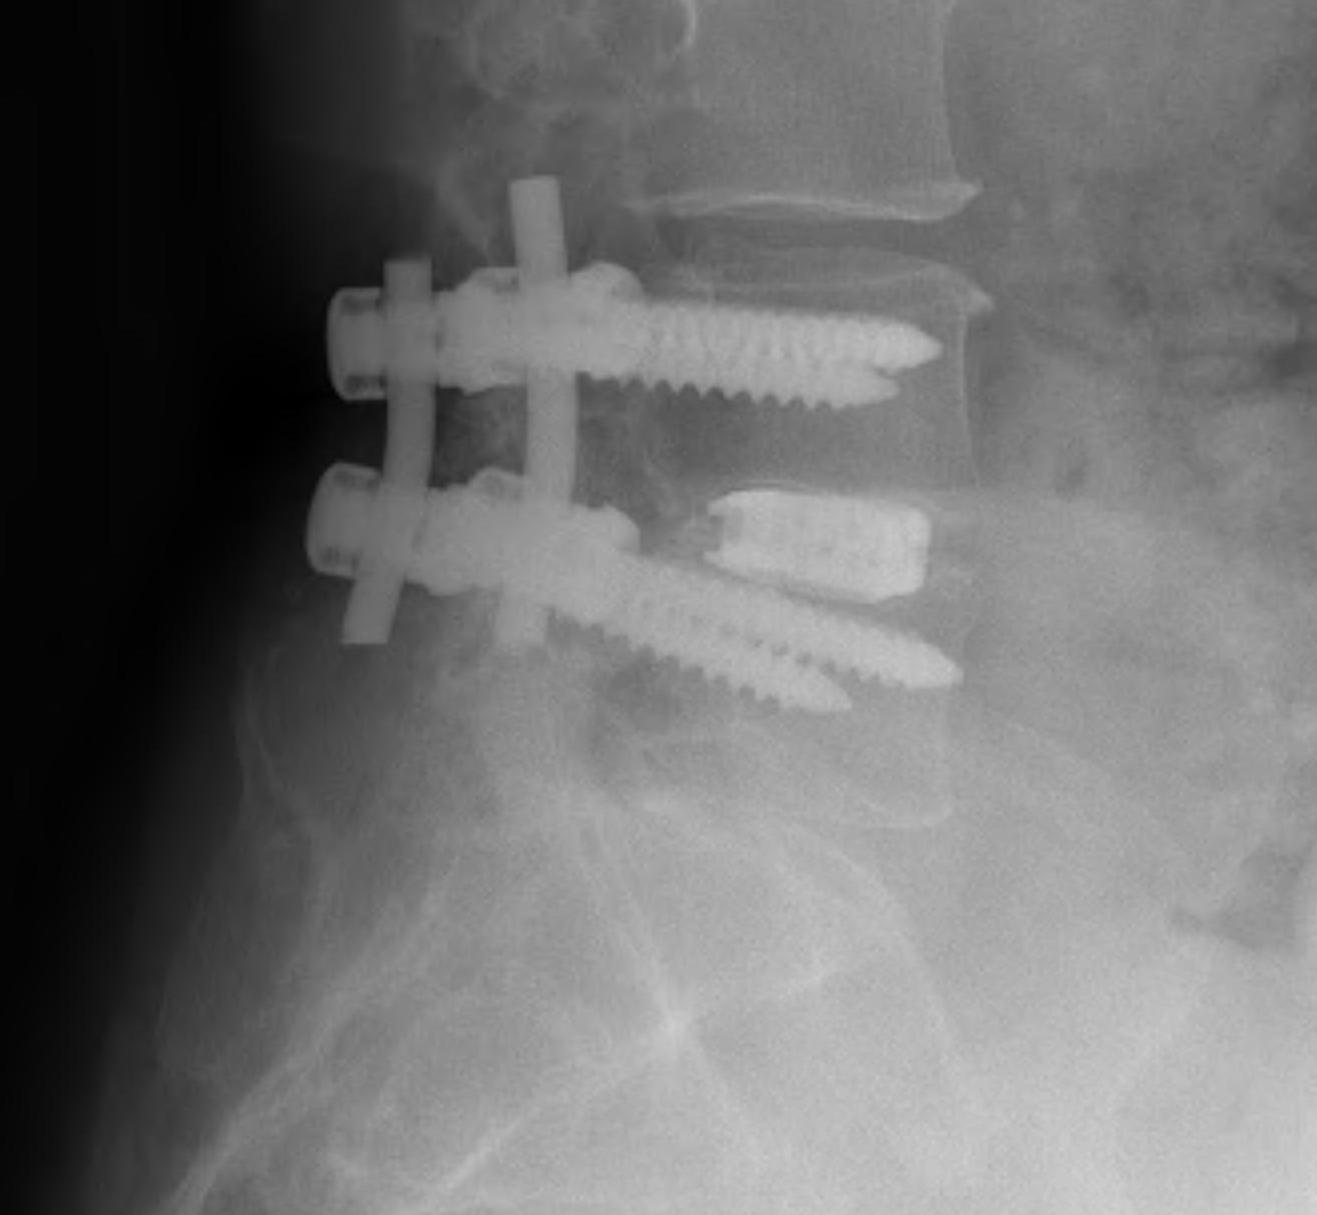
PLIF / Posterior Lumbar Interbody Fusion
Technique
1. Wide laminotomy
- resection flavum, significant cranial lamina
- preserve if possible the posterior elements
- spinous processes, supra and interspinous ligaments
- these provide tension stability
- resect medial two thirds of superior facet / lower one third inferior facet
2. Resect disc
- retract dura and traversing nerve root medially
- distract disc space with lamina spreader
- disc space retractors (insert wedge, then turn on side)
- remove end plates
3. Insert interbody device
- carbon or titanium cages
- wedge shaped
- allows correction of sagittal deformity
- allows restoration of disc height
- immediate stability
- facilitates fusion
- usually contain morcellised allograft / BMP
- check under II that interbody device not too posterior
4. Stabilise with pedicle screws
Complications
- dural tears
- nerve palsy
- hard ware failure
- psedoarthrosis
ALIF / Anterior Lumbar Interbody Fusion
Surgical Technique L2 - L5
Patient supine, stand on right
- find level with II
- make incision through skin and subcutaneous fat
- divide external and intenal obliques and transversus
- mobilise peritoneum around, until see psoas
All dissection with swabs on sticks or peanuts
- ureter lifted up with peritoneum
- diva retractors for bowel, as per general surgery
- self retainers attached to side of bed
Common iliac artery and vein on medial psoas
- mobilise vessels medially, psoas laterally
- will see large sympathetic trunk, mobilise either way (don't damage to avoid retrograde ejaculation)
- may need to divide iliolumbar vein
Identify disc
- check level again with needle
Steinman type pins in vertebral body to keep back bowel
Divide ALL (can keep as layer, especially in Disc replacement)
- remove entire disc
- knife, rongeurs, normal and ring curettes
Distract disc space
- special lamina spreaders
- disc distractors (wedges inserted then turn on side i.e. 10 - 14 mm)
- pins in bodies above and below and add distracting device as per cervical fusion
Remove end plate to bleeding bone
Interbody cage
- trial for height, depth and angle
- i.e. 6o 10 mm
- check II to make sure not too far back
- insert real prosthesis
- augment with plate
Surgical Technique L5/S1 Fusion
Access between vessels
- much easier than going to the lateral side of one and mobilising it medially
- identify sacral promontory, big angle as sacrum dives away
- use pins and retractors as before
Resect disc and minimal end plate
- just to bleeding bone for fusion
- not too much so bone is soft and cage or disc subsides
Trial for height & angle, II for depth
- insert cage
- these made of plastic with same modulus as bone
- doesn't compress but at same time doesn't subside into bone
- cage is radiolucent except for small opacities to see on x-ray
- cage has cental hole
- fill with synthetic bone graft, mixed with patient's blood and rolled as sushi in BMP membrane
- insert cage, can put more synthetic BG/BMP around it
- check II, ensure not too posterior
- application of anterior plate and screws
Pedicle Screws
Concepts
Advantage
- superior to sublaminar wires or hooks
- purchase in all 3 columns
- cross-linkage and converging screws enhances pullout strength
Considerations
- essential to have fit & fill of pedicle
- bone mineral density of vital importance with pedicle screws
- minor osteoporosis OK
- marked osteoporosis hooks as good as screws
- bicortical fixation improves strength but only safe in S1
- pedicle screws not safe in S2 at all
- if fracture pedicle greatly reduces strength of construct
Objective
To place screw through centre of pedicles
- parallel to upper end plate or slightly angled downward
- screws also converge towards midline
- up to 20% depending on spinal level
- this is to ensure do not penetrate lateral wall of vertebral body
Radiation
- II facilitates insertion
- can use computer navigation
Entry Points
1. Thoracic spine
- entry just below rim of upper facet near base of TP
- angle 7-10o towards midline & 10-20o caudally
2. Lumbar Spine
- entry at junction TP & superior facet
- angle: screws converge 5o at TLJ and increase 10-15o as one progresses from L2-L5
3. Sacrum
- S1 only safe level
- line tangential to lateral border superior articular facet &
- line along inferior border of superior articular facet
- angle: screws converge towards midline / aim at anterior corner of promontorium
Technique
Osteotome away facet joint
- reveal cancellous bone
- entry with curved awl
- ball tip guide, bone on all 4 sides, check II
- pass tap
- insert screw (6.5, 5.5, 4.5, 30 - 40 mm long)
- usually poly-axial heads
Complications
Union rate >90%
Screw misplacement 4%
Nerve and spinal injury 1-20%
- most misplaced screws don't cause neural injury
- higher risks with power over hand preparation
Infection 1.1-4.2%
- usually can leave metal in situ with early washout & debridement
Screw breakage 2-60%